|
|
Post by blacklight on Jan 12, 2013 13:59:30 GMT -5
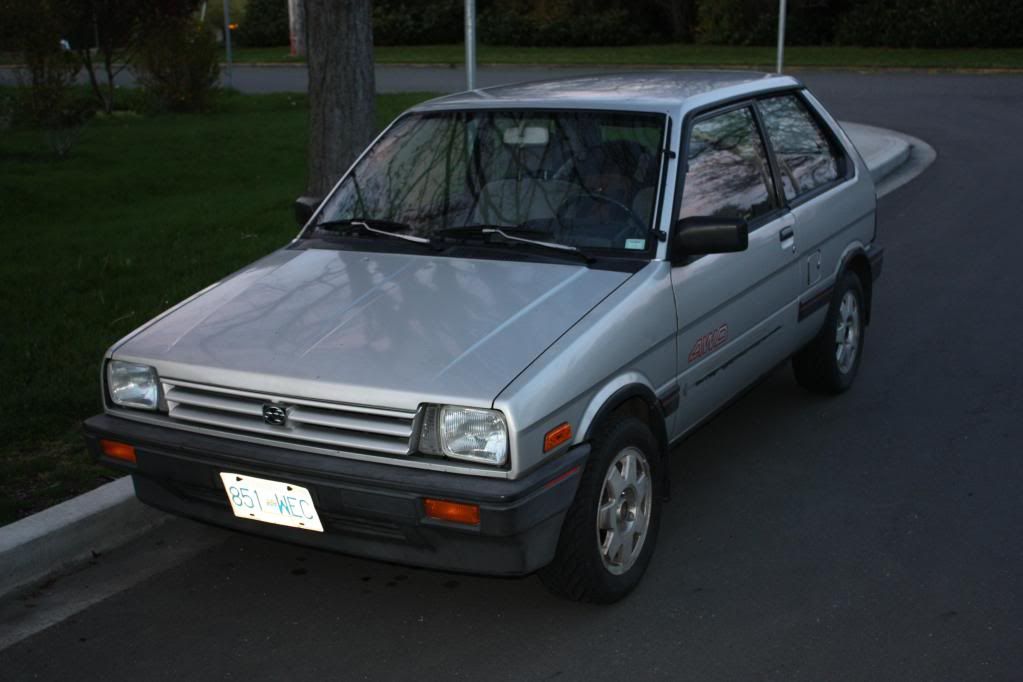
Hi all. This is my thread about doing a quick budget rebuild of my 1989 Justy with carb and 4x4. I call this a budget rebuild since I won't change the oil pump internals or the crank bearings, because I must order these from Subaru, and the oil pump internals alone seem discontinued, only the complete crankcase cover is available... :S The following are subject to change/renewal/rebuild/call-it-what-you-want:  -Crank rod bearings. -Water pump, with seals and gasket. -Engine block heater (extra aftermarket equipment). -Weatherproof connectors for the oxygen sensor, carb electrics, water temperature sensor and the distributor pickup. -New gaskets and seals everywhere in the engine. Note: Seem VERY hard to come by the valve seals. I think I just get 2 per cylinder in the kit. -New clutch kit, with pressure plate, release bearing and disc. (Don't know if that small bearing in the flywheel needs replacing or if it's of importance. May order separately.) With most of that on it's way, or about to order, I started my journey.  Started off by rolling the car into the garage. There were already a car there, so I couldn't park it there over night. This is before I started disassembling or removing anything.  Admittedly, I could have swept off most of the snow outside the garage...  The easiest part of the whole operation I believe, is to remove the air cleaner assembly. 2 bolts and a wing nut, then 2 hoses. Besides, the air cleaner is in the way of removing a bunch of other things, so It had to go first.  Close-up of the carb.  Carb successively removed, and the hoses to the CFC-canister and to the 4WD-changeover solenoids. I also removed the cables for the alternator and the oil pressure switch, so that I could remove the entire rear engine harness.  Drained the coolant, then focused on getting the whole cooling system empty, which proved more difficult than I thought, since the drain plug isn't the lowest point on the system; the lower radiator hose is... After learning that, I removed the speedometer cable (bracket bolt was stuck, so I removed the cable itself instead.) Removed the starter's cables and the clutch cable and some ground wires.  I quit for the day when I basicly had removed all hose and electrical connections to the engine and transmission that is accessible from the hood.   Tomorrow, I will try to focus on getting the exhaust off from the manifold, but I'm not sure about the best way to do this, since it's custom form the elbow pipe to the muffler. I have removed the only 3 (!) bolts that secured the elbow pipe to the manifold, then what? Also, another vital question; what's the best way to remove the engine if you have no hoist, and limited ceiling clearance? I was thinking about putting a garage jack under the mid part of the assembly, then removing the final bolts, letting the engine rest on the garage jack. After that, close the hood and lift the front of the car up and then pull the engine out. Or should I just get a bunch of muscle-able buddys and lift the engine out from the car via the hood? This is a headache for me... :/ Aw well. Quite happy with todays work. Hope to get the engine out tomorrow, if no complications arise. //Magnus. |
|
|
|
Post by madmatt on Jan 12, 2013 15:24:54 GMT -5
I just picked up oil pump internals here... I'm surprised you can't get them.
As for pulling the engine without a hoist. Plan on pulling the front rad support, then a stout board that will cross beyond the fenders, and 2 people can lift it out. One on each side. Up and out through the hole where the rad was.
|
|
|
|
Post by blacklight on Jan 12, 2013 19:26:27 GMT -5
Hi madmatt Where are you located? Here in Sweden, Subaru doesn't have a "middle man", they run the dealerships and the workshops on contract with partners. (In other words, they don't have an agent.) They just want to sell new cars, not keep the old ones running. :/ I discussed your idea about removing the engine with my father, and we concluded that an aluminum ladder and a chain going from both the manifolds and another around the transmission, or to a bolt on the transmission, just to get 3 points and thus, stability on the engine when we remove it. I will remove the cooler and the support for it tomorrow. After that, I'll detach the exhaust, CV-joints and the gear shifting linkage. I believe it's just the engine mount bolts left after that? Correct me if I'm wrong. //Magnus. |
|
|
|
Post by madmatt on Jan 12, 2013 21:25:35 GMT -5
Magnus,
I'm in Canada. Sourced the pump from the dealer. The local auto parts places, and rock-auto do not have them. But with the dealer it was a next day order (or there abouts)
Just saw your video from under the car. If you unbolt the cat (three bolts) from the header, you should be able to drop that one piece welded mess out the bottom. Leaving the header on the engine will make it easier.
The cV's are easy, just make sure your punch is not so small it will slip inside the split pin, otherwise it will become a mess. There's lot's of ways to get enough room to pull the CV off, I just unbolt the ball joint from the spindle (leave it attached to the lower control arm) and then pull the hub/spindle away from the motor and the inner CV drops off.
The rear motor mount by the shift linkage is the "bear". It's not so bad coming out, but lining it up going back in is a pain. A hoist would be nice there...
Matt
|
|
|
|
Post by blacklight on Jan 13, 2013 15:32:06 GMT -5
Madmatt: I removed radiator and it's support. Thanks for that tip. Today, I got the CV-joints, gear shifting linkage and radiator+support removed. I think it's just the engine mounts left now. The one at the coolant reservoir, the one on the support beam, and the one at the trans axle. Q: Is it vital to mark the trans axle's position in relation to the gearbox splines? My father asks. Since there's no spring pin to remove, I believe it won't matter. //Magnus. |
|
|
|
Post by blacklight on Jan 13, 2013 17:18:40 GMT -5
Oh. And here's some pic's. After removing the 2 bolts holding the radiator mounts, I pulled the radiator and the reservoir away.  Removed the air plate (word?) right to the radiator's place.  View from the front. This is where I noticed another one of the insane things the previous owners have made. I think the bolts between the manifold and the elbow pipe siezed at some point, or the previous owner never understood how they were supposed to be tightened. There's exhaust repair paste along the flange, and if you look at the front of the pipe, he have put a weld between the flanges too... -.- This complicates disassembly a bit... :/  After I was done in the engine bay, I removed the ball joints on both sides, then the CV-joints and ended the day with detaching the gear shifting linkage.  |
|
|
|
Post by madmatt on Jan 13, 2013 19:42:40 GMT -5
Q: Is it vital to mark the trans axle's position in relation to the gearbox splines? My father asks. Since there's no spring pin to remove, I believe it won't matter. Not quite sure what you are asking? If regarding the outputs (stub axles) and the corresponding CV joint, they only fit one way, as the hole for the split pin is off set of center. If regarding the output for the rear propshaft vs the front stub axles, no there is no concern here. Again, not sure if that's what you are asking. Matt |
|
|
|
Post by blacklight on Jan 13, 2013 20:03:44 GMT -5
Madmatt: I figured. Thanks. Like I said, the reason I'm asking is because my father wanted to know. He said something about the balance of the propeller shaft, but if the propellershaft were balanced mounted on the vehicle, one could imagine there would only be one way to fit the shaft to the gearbox splines. And since there's only splines and no pin, it must be independent to where the splines in the gearbox is. Tried to explain this to him, since my E10 is the same way. Now that that is out of the picture, I have another q for you. Q: How does one check the play in the universal joints and the condition of the support bearing of the porpeller shaft? //Magnus. |
|
|
|
Post by madmatt on Jan 13, 2013 22:06:02 GMT -5
That I don't have a good answer for.... I check the play by replacing when they make noise! I've never changed a hanger bearing. I have hammered on the bearing support to get it straight again! |
|
|
|
Post by blacklight on Jan 14, 2013 11:47:00 GMT -5
Today I got the exhaust manifold+ elbow pipe removed. I also removed the rest of the exhaust because I need to weld another rubber-support for it mid way.
I also got what was left of the support plate for the fuel pump and filter. Proved to be difficult, since the plate were like crackers and the rear bolt was stuck. Ended up destroying the mount, but I was gonna weld a new piece there anyway.
Q: What's the best way to reach the harness connector for the fuel pump? Mine were drawn into the body when I disconnected it, and I'm not sure if I can get it out. :/
//Magnus.
|
|
|
|
Post by madmatt on Jan 14, 2013 12:54:11 GMT -5
You should be able to get to the harness by removing the bit of trim and carpet at the front of the back seat. Edit... I think the connector is beside the seat, accessible behind the plastic molding. The fuel pump mount is the first thing to rot away... My solution, although there's a lot of non stock metal there now, is 1/2 way down this page. subarujusty.proboards.com/index.cgi?board=rally&action=display&thread=2915&page=2 |
|
|
|
Post by blacklight on Jan 14, 2013 14:38:13 GMT -5
Thanks Madmatt. You're an asset to this forum. Yeah, I'm gonna slaughter an old computer chassis for the steel (galvanized and easy to shape. ) Also need a new filter-holder, but I figure an easy way for this is just a bolt or something on the new plate and a hose clamp big enough around the filter. Will take pictures upon fabrication. |
|
|
|
Post by blacklight on Jan 15, 2013 13:34:24 GMT -5
Today I made a template for the fuel pump bracket, and after about an hour of getting the holes and shape of the bracket right, I copied the template to a piece of sheet steel from an old refrigerator. Sorry there's no pictures of the process, but I can post a refined picture of the template and the finished bracket. Gonna try getting the engine out tomorrow, then the next task will be to inspect everything for wear and make assessments of what needs to be done. //Magnus. |
|
|
|
Post by blacklight on Jan 16, 2013 14:13:56 GMT -5
Tried getting the engine but after having a look at this diagram ( dustysjustys.com/IPL/JFIG410-1.jpg ), I appearently missed the right bolt of the rear transmission mount...   Well well. Now it's just to remove the last bolt, then lift/pull the engine out. I also removed the drivers side (LHD) door to repair the rust hole across the entire bottom. Will make a template and post pic's of this, but maybe in the body-section. //Magnus. |
|
|
|
Post by blacklight on Jan 19, 2013 9:57:43 GMT -5
Q before I pull the engine+trans. out; how much does it weigh?
My father thinks I'm gonna have to rig some sort of tripod or something similar and then use a wire hoist to pull it.
//Magnus.
|
|
|
|
Post by blacklight on Jan 20, 2013 12:25:07 GMT -5
News: Got the engine out today!  Though, I did not know that the gearbox had to be drained for it's oil before popping the propeller shaft. :/ BIG oil slick on the floor now... :/ Anyway. Gonna separate the engine from the transmission tomorrow. May post pic's later. //Magnus. |
|
|
|
Post by blacklight on Jan 21, 2013 12:16:47 GMT -5
Separated the engine from the transmission today. Though, I should have loosened the crank pulley before I even removed the engine from the body.  The clutch looked very good, but to be sure, I would need the maintenance standards data, like disc-to-rivet hight for the clutch disc, and so on. The thing I didn't check was the release bearing, but I'll do that tomorrow. Oh. And the clutch disc cover said "Exedy". I looked up the part no. on the clutch disc cover and found out it's a Exedy FJC506 racing clutch.  Btw. Is this flywheel surface ok?  Before I quit for today, I removed the cam belt cover, and first thing I noted was that the belt was very slack, which would put at risk for the belt to slip. I also noticed that the plastic thingy inside the tensioner spring was crawling out, and that the spring looks like it have received a punch from a hammer, deforming it.  The upper cam belt pulley also have a broken bolt. :/  Q: How do I remove the broken bolt in the camshaft? :/ A punch on a screwdriver, making a cut in what's left of the bolt, and then heating the cam shaft end? //Magnus. |
|
|
|
Post by Armageddous on Jan 21, 2013 21:56:22 GMT -5
Nice progress. As far as the broken bolt, I would probably just try to take it out with pliers or your fingers first, I doubt it's stuck in there. The cam is such a hard material that the threads are pretty much indestructible and I bet someone just over tightened it.
Terry
|
|
|
|
Post by blacklight on Jan 22, 2013 13:55:23 GMT -5
Thanks, Terry. Will try with the screwdriver, cause I can't get any pliers in the bolt hole. :/ Todays progress was pretty much straight forward. I unbolted the 2 remaining screws for the cam pulley, then removed the cam belt.  Removed the tensioner + spring and the inner cam belt cover. I think I'll install an other spring from one of my E10's... :/  Oh. And a hint if you haven't loosened the upper cam belt pulley bolts before removing the belt, put a 12mm wrench from the crankcase cover bolt to a divot in the pulley, then loosen the 3 10mm bolts.  View of the engine. I think it's a good thing I'm gonna change my cam shaft seal... :/  Next up; oil pan! Apparently, I have a broken bolt for the pan, just under the ear for the alternator.  The oil pan was far from empty, despite of draining it for about 1-1½ hours... :S Note the ugly oil return pipe from a previous turbo build...   Removed the water pump cover, after learning that there's actually 3 points to drain the coolant system before it's actually empty; the radiator, the lower radiator hose, and then this god damn plug on the water pump housing. -.- Anyway, anyone know why the tiny I-don't-have-a-word-for-it thingys on the water pump impeller are, and how they got there? They seem solid, and won't go away when i rub my thumb on it.  Another pic.  The seal surface on the pump impeller was broken at 2 places. Luckily, I'm changing the water pummp ASSY too.  Removed the intake manifold and managed to get the gasket out without damage. Note the somewhat clogged (?) EGR-port. :/  Shutting down for the day, I removed the rocker cover, the rocker shaft and the camshaft.   I used two cotter pins to secure the rockers onto the shaft, keeping order.  Sorry there's no pic's from removing the crankshaft cover. Also, how does one measure the condition/wear of the chain and chain guide? Need to know since I haven't found anywhere to order these. :/ Brought the rockers and the camshaft home to clean/inspect/get that darn bolt out. //Magnus. |
|
|
|
Post by blacklight on Jan 24, 2013 19:56:10 GMT -5
News time! I took the engine outside and cleaned it (should have done the rough-cleaning while the car was running, and fine-cleaning when I still had the crankcase cover on. Still learning... ) I've also removed the cylinder head and the cylinders are VERY clean and nice, no turnmarks, nothing. The head however... Well, I only ran it short distances after I fixed my dissy problem (see other thread) just before new year, and I think that's why it have sooted up so bad. :/ Also, since the car seem to have a persistent error code (can't remember which, but I think it's the duty solenoid, again...), I think it runs rich, and some deposits on the valve seal surface indicate that the exhaust valve's play were to tight. :/ Anyway. I've removed all the valves and started the cleaning process by putting an exhaust valve into my fathers metal-lathe (word?), and using sand paper to get rid of the deposits. Sure. Nice result, but WAY to time-consuming. So. Q1: Need to know if the flywheel surface is re-usable, or if I should do something about it, other than cleaning it? Q2: Anyone have a good way to clean the rest of the valves? //Magnus. |
|