|
|
Post by eporter123 on Dec 19, 2007 12:13:17 GMT -5
My tach sometimes won't work for awhile. OR, it'll get stuck at some random spot, and only move up a couple hundred RPM and drop and stick at the same spot. Like it'll be at 2000rpm, even when stopped and idling below 1000. Drive down the road, engine gets to 2krpm, needle moves up to 2500rpm, stays there, stop again, needle drops to 2k while engine is at idle.
After awhile driving down the road the tach works ok.
I'm thinking water is getting in a connection, then drying when the engine warms up?
Is this just a cruddy connector issue or?
Just wondering which harness in the jumble I should clean up, or is this a common problem?
|
|
jimm
 1993 GL
Posts: 63
|
Post by jimm on Jan 4, 2008 16:25:27 GMT -5
Don't really have an answer but maybe a bit more info...
Your problem reminded me a bit of the way my Tach works and what I've noticed is that it seems very damped in action, but the colder it is out the slower it is up to having it not move at all until the car warms up a bit. My thought was that the meter action is fluid damped and it is affected by the temperature. When it is warm out the meter seems to work well enough.
|
|
|
|
Post by fraser9764 on Jan 8, 2008 16:18:12 GMT -5
check the plug on the back of your alternator, im sure the tach is fed from there.
|
|
|
|
Post by Scoobaru on Jan 8, 2008 23:14:03 GMT -5
One of mine used to wrap right around the dial when you first started out when it was cold out (like -20 or lower). Would come back to normal operation once it warmed up.
|
|
|
|
Post by eporter123 on Jan 9, 2008 11:56:45 GMT -5
It might have something to do with the speedo needle sticking in the actual gauge cluster until it warms up enough to come free. It wouldn't take much dirt/dust/whatever else has accumulated over almost 20 years to cause it to stick. There's a magnet spinning on the end of a cable from your transmission that creates a magnetic "eddy current" that acts on the needle. Pretty cool. auto.howstuffworks.com/speedometer2.htmI'm going to get a can of contact cleaner and some dielectric grease and go to town on my underhood electrical connectors some day. Until then... |
|
Deleted
Deleted Member
Posts: 0
|
Post by Deleted on Aug 20, 2009 10:13:36 GMT -5
FYI the tach gets it's signal from the + side coil wire.
|
|
|
|
Post by RedRooJusty on Aug 23, 2009 10:58:47 GMT -5
My tach sometimes won't work for awhile. OR, it'll get stuck at some random spot, and only move up a couple hundred RPM and drop and stick at the same spot. Like it'll be at 2000rpm, even when stopped and idling below 1000. Drive down the road, engine gets to 2krpm, needle moves up to 2500rpm, stays there, stop again, needle drops to 2k while engine is at idle. After awhile driving down the road the tach works ok. Mine is doing this about once a week, by the time I get to work it is fine (~10 min). I believe that this is a grounding issue at the tachometer. Let me explain: I can rev up a few thousand rpm's and the tach will slowly crawl up to ~2K, I then turned the engine off and the tach was still up ~2k, it slowly came back to zero. This is classic inductance. Most likely caused by a ground that has changed from a low impedance to high impedance. ** now remember that most instrument clusters have connectors that are not protected against oxygen or humidity (so they will corrode over say ~20 years of daily thermal cycles and morning dew) ** I will try to take the instrument cluster out this weekend, with the original intent of replacing bad bulbs, and give the various connections a once over for corrosion prevention. I will take pictures and let you all know if this also fixes the tachometer. ***update*** The instrument cluster looks like a pain to pull. Upon others suggestion, I just replaced the coil and the issue is gone. thanks Raw Justyce. |
|
|
|
Post by Raw Justyce! on Aug 28, 2009 4:07:11 GMT -5
I had the same problem for a few days. I shut off all the lights in my shop and looked under the hood while the car was running. My coil was arcing every now and then, and when I replaced it the bad coil the problem stopped. Not saying thats your problem, but thats what happened to me. Worthy of a look at least (I hope)  |
|
|
|
Post by RedRooJusty on Dec 10, 2009 3:09:05 GMT -5
I am resurrecting this thread...My tach sometimes won't work for awhile. OR, it'll get stuck at some random spot, and only move up a couple hundred RPM and drop and stick at the same spot. Like it'll be at 2000rpm, even when stopped and idling below 1000. Drive down the road, engine gets to 2krpm, needle moves up to 2500rpm, stays there, stop again, needle drops to 2k while engine is at idle. After awhile driving down the road the tach works ok. I'm thinking water is getting in a connection, then drying when the engine warms up? Is this just a cruddy connector issue or? Just wondering which harness in the jumble I should clean up, or is this a common problem? OK, with the colder weather I now am getting the "sticking" tachometer just like **eporter123** described in the first post. I can smack the cluster and the tach needle will move a small bit. Don't get me wrong, my earlier posting was true and replacing the ignition coil did solve that failure mode.  First procedure I find for removing the instrument cluster: REMOVAL & INSTALLATION
Justy
1. Disconnect the negative battery cable.
2. Remove the retainer clips and choke knob and nut, if equipped.
3. Remove the instrument cluster trim cover retainer screws and clips.
4. Remove the trim cover, and place aside.
5. Remove the defroster duct assembly.
6. Disconnect the heater control cable from the air selector rod at the heater unit.
7. Remove the instrument cluster retaining screws, and carefully pull the cluster assembly forward enough to access the rear of the assembly.
8. Disconnect the speedometer cable from the rear of the instrument cluster.Disconnect the electrical harnesses from the cluster assembly.
9. Remove the instrument cluster from the mounting tabs.
10. Installation is the reverse of removal. Secure all components accordingly.
11. Test all instrument functions, including the gauges and dash light to make them work correctly. Really??? I have to take the whole dash out to get to the instrument cluster? Wow I am really in for some fun  , I am going to put all new instrument lights in as well (why not replace them when I'm in there). Has anyone found a fix for the sticking tach? Tips? Tricks? My current thought is to disassemble the meter, clean + lubricate the moving parts, and take a pictorial to share the fun with all of you. I am feeling bold, but I might just have to put up with this tachometer annoyance till the weather warms up or till I can clear enough space in the garage (that's an even bigger job  . -good times -RRJ
|
|
|
|
Post by RedRooJusty on Dec 10, 2009 11:03:42 GMT -5
Right now it is just an annoyance, I may hold off till I get more advice.
|
|
|
|
Post by redmavis12 on Dec 10, 2009 12:32:49 GMT -5
Well, Red Roo, I have a similar problem except mine is with the shift light (poor man's tachometer) in my '94 DL. It works intermittently and I cannot determine the circumstances that causes it not to work. Almost seems to work better when cold, but not all the time. If the tach problem is mechanical in nature, then I guess there is no similarity between the two except for a signal wire or ground problem. I've searched but cannot find an adequate wiring diagram for the shift light so I don't know what/where the inputs are. Frustrating!
|
|
|
|
Post by eporter123 on Dec 10, 2009 12:59:51 GMT -5
Well, it's been almost 2 years and I still haven't done anything. There's a lot involved in taking that dash out! It's easier to wait for the tach to "warm up" in cold weather. RedRoo, if you take out the dash, try putting some LED bulbs in there. The Land Cruiser guys have a big thread on this forum about replacing stock bulbs with LEDs: forum.ih8mud.com/60-series-wagons/261572-led-light-swap-lots-pics-dial-up-bad.htmlObviously you don't have to go colored. It's interesting seeing the results of varied levels of LED power. The best part is that the LEDs are relatively cheap, and you won't have to replace them again. If you go this route, keep us posted.d |
|
|
|
Post by RedRooJusty on Dec 10, 2009 13:28:24 GMT -5
**eporter123**, creepy man great minds think alike. I am sitting at my desk calculating voltage dividers for the different color LED's I have in my parts bin. I find pre-made automotive LED's dont work well for warning indicators, as they have very narrow color spectra bandwidth, meaning the psudo "white" pre-made LED is really a blue led doped with a yellow sulfur cap -> giving it's true spectra as yellow + blue, this won't work well for a red warning light you dig. The only way to preserve bright warnings is to match the LED color to the indicator color. I am doing four colors (green, blue, amber-yellow, red), each LED type requires slightly different voltage and current. I am targeting a indicator range of 7~15volts. I am doing LED's thoughout instrument cluster, just making them myself  to save cost. I can make them for pennies. Purchasing them by color is pricey. |
|
|
|
Post by RedRooJusty on Dec 10, 2009 13:37:21 GMT -5
**redmavis12** I can only find reference to a "shift light" in the schematics for the 87-88 carbed justy. 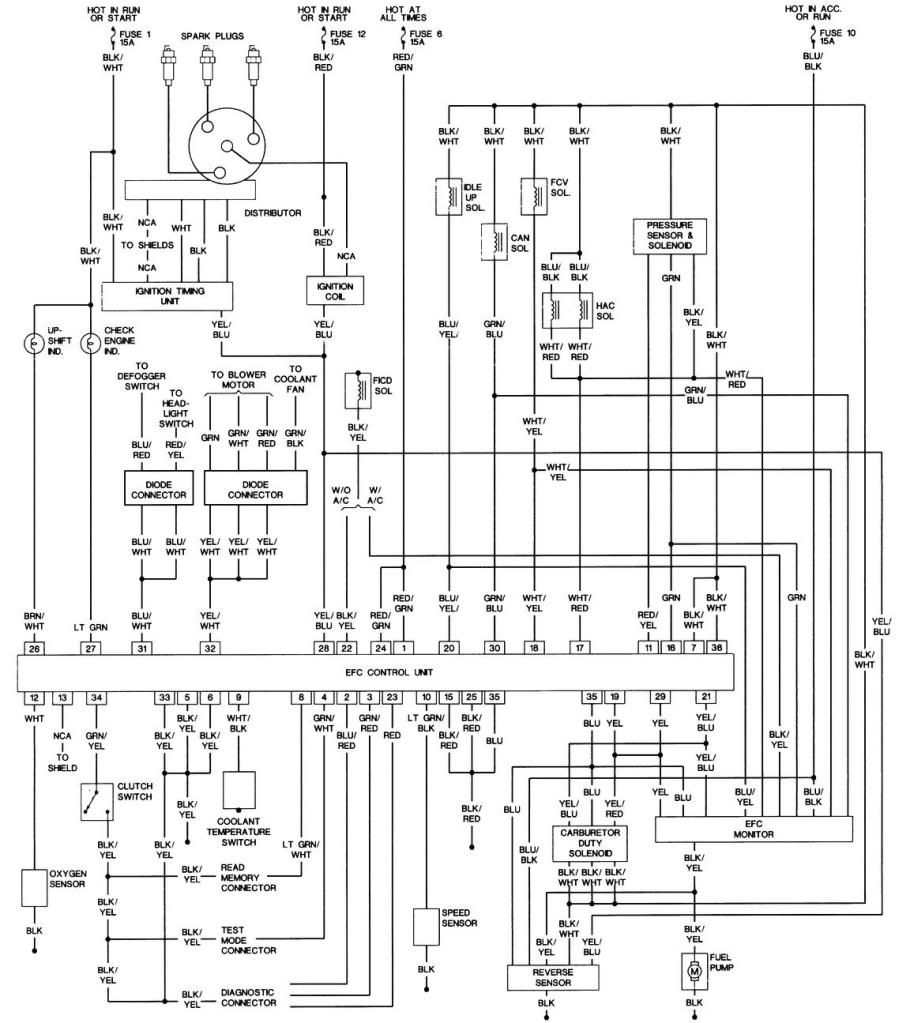 It looks like the ECU controls the light, most likely from O2 and ignition inputs. I would check on the light itself first. -RRJ |
|
|
|
Post by redmavis12 on Dec 11, 2009 12:20:16 GMT -5
Thanks RRJ...that's the only wiring diagram I have found also, but nothing for second generation Justys (mine is a '94). I suppose it is pretty much wired the same way, just a matter of tracing the wires back. My first inclination was also the bulb itself or a loose connection, but then I'd have to tear into the dash also...not worth it for a stupid upshift lamp. Looking forward to seeing how you make out with LEDs behind the dash.
|
|
|
|
Post by RedRooJusty on Feb 24, 2010 3:21:38 GMT -5
--Update-- I have three months of "burn-in" testing on my dash lighting LED's, as I want reliable indicators. I have a retraction from my previous postings, I am going with white LED. I tested many LED color configurations, during these tests I found a specific white LED that has enough spectrum to illuminate all the essential indicators in the instrument cluster. I simplified my circuit to just one resistor adding 5 cents more cost to each. Each LED bulb is composed of a 4 LED cluster and one resistor. At 15vdc they draw .032A for ~0.48watt. I targeted a voltage range of 6~15vdc. The highest temperature measured was 33°C at the resistor, the LED's stayed at 27+/-2°C, the ambient temp for the test was 22°C 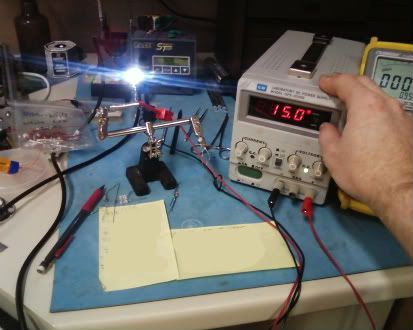 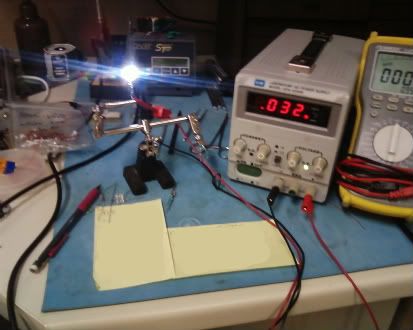 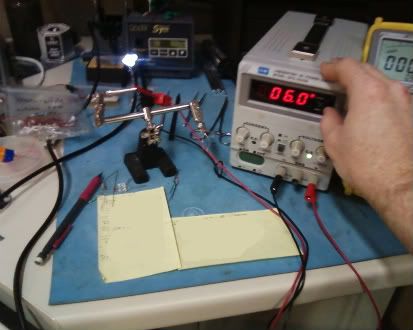 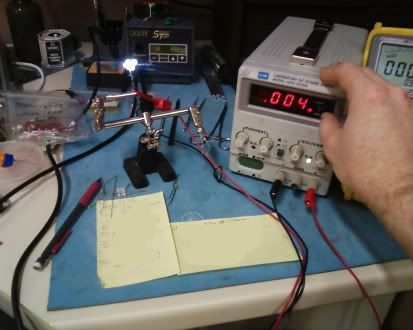 Now onto more destructive testing like the high (all day in the blazing sun, ~60°C) temperature test . Still lots more prep-work to do before tearing the dash out.. -RRJ |
|


 , I am going to put all new instrument lights in as well (why not replace them when I'm in there).
  .
. to save cost. I can make them for pennies. Purchasing them by color is pricey.