
Post by Danimal on Jun 4, 2010 19:06:28 GMT -5
This brief writeup is about the rear brakes for GenI Justys; I don't know how similar GenIIs are.
After safely lifting and securing the Justy, remove the tire/wheel.
Remove the hub cap:
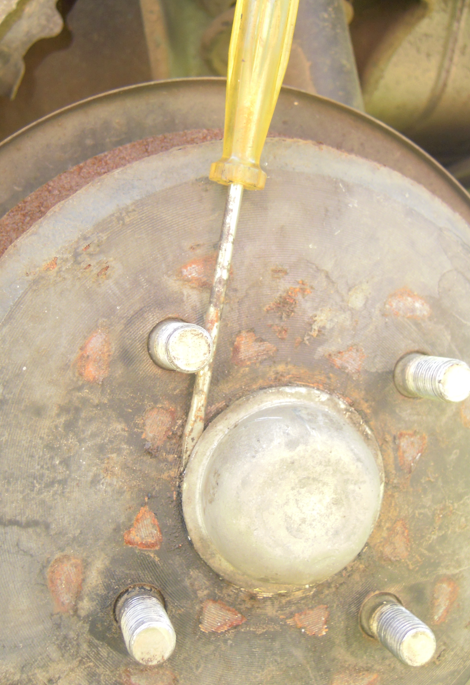
Then straighten the lock washer:
and remove all of the bits from the spindle end. Don't drop the bearings in the dirt or get them dry/gritty!
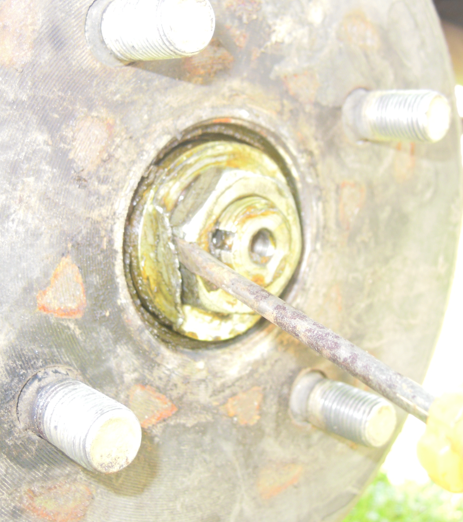
Before removing the brake drum it may be necessary to adjust the brake shoe away from the inside of the drum. It is difficult to understand what you are adjusting if you have not seen it already apart, so, to move the adjuster from this position:
to this one:
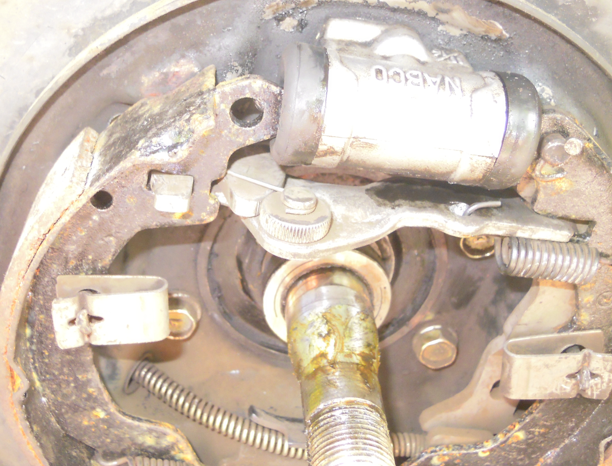
just push the adjuster diagonally towards the front of the Justy.
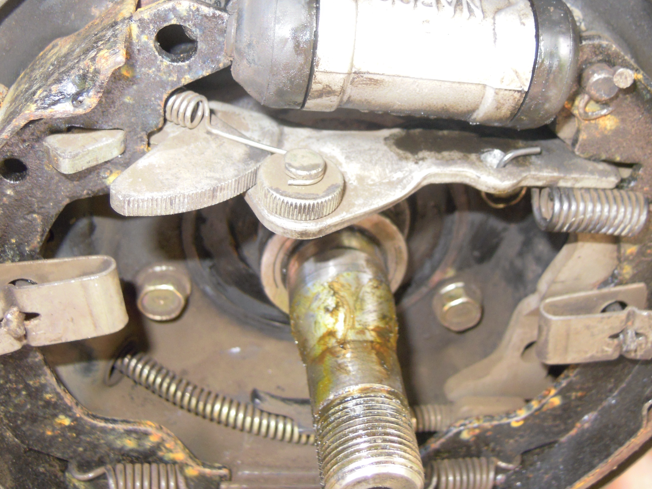
Now, looking at the other side without the brake shoe in the way:
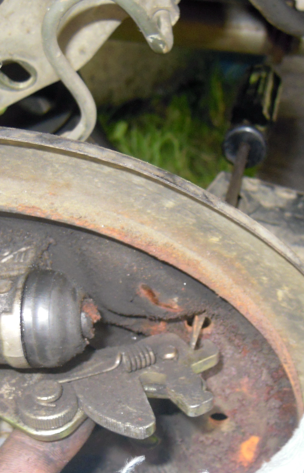

Notice the brake line lifted up out of the way in the background.. I don't think this is necessary but it can really help depending on what size/shape tools are being used or whether or not you know exactly where the adjuster needs to be pushed. Just remove the one bolt from the bracket and GENTLY lift it out of the way. DO NOT wiggle the brake line or move it excessively!... In fact it really is best not to move it out of the way at all if you can manage to release the adjuster without doing so.
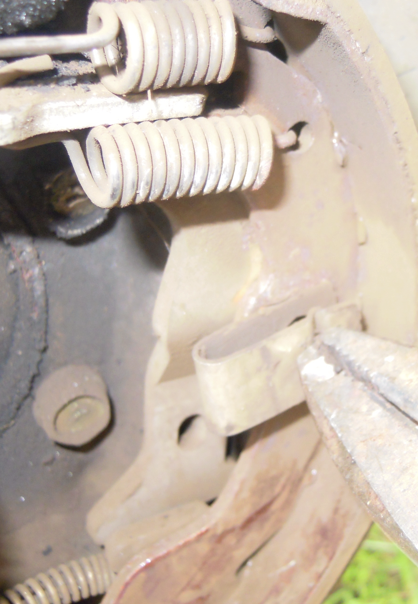
The long springs can easily be removed with a pair of needle‒nosed pliers or very easily removed with a pair of hooked‒needle‒nosed pliers.
Push in the spring-plate and twist the flat-ended nails out of the lock position:
Straighten and remove the pin holding the top of the rear shoe on the peg:

Installation of new shoes procedure is the reverse from removal, with the exception, of course, of not needing to move the adjuster. Just assemble and install the shoes and components with the adjuster at its loosest setting. This allows for the drum to slip on easily and the adjuster springs out to the correct position as soon as the brakes are used. The rear spindle nut ought to be brought to 29 ft. lbs. before you rotate the hub several times in each direction and then loosened and retightened to only 1 ft. lbs. Then bend the lock washer up beside the nut on one side before replacing the hubs dust cap. If the Justy is a 4X4 then you would tighten the axle nut to 108 ft.lbs. and install a new cotter pin if the old one is too soft after being reinstalled. On that note, the lock washer ought to be replaced as well if it ever gets too worn and weak/soft.
Easy, huh?
Brakes are an aspect of automotive mechanics what are known about in great detail by a large number of drivers, and for this reason, I imagine that it is one of those issues which is somewhat avoided because it is sure to spark argument or debate. I have nonetheless posted it anyway to be helpful to any novice mechanics lucky enough to have a Justy. Please feel free to add your comments, questions, or corrections below.
Danimal
After safely lifting and securing the Justy, remove the tire/wheel.
Remove the hub cap:
Then straighten the lock washer:
and remove all of the bits from the spindle end. Don't drop the bearings in the dirt or get them dry/gritty!
Before removing the brake drum it may be necessary to adjust the brake shoe away from the inside of the drum. It is difficult to understand what you are adjusting if you have not seen it already apart, so, to move the adjuster from this position:
to this one:
just push the adjuster diagonally towards the front of the Justy.
Now, looking at the other side without the brake shoe in the way:
Notice the brake line lifted up out of the way in the background.. I don't think this is necessary but it can really help depending on what size/shape tools are being used or whether or not you know exactly where the adjuster needs to be pushed. Just remove the one bolt from the bracket and GENTLY lift it out of the way. DO NOT wiggle the brake line or move it excessively!... In fact it really is best not to move it out of the way at all if you can manage to release the adjuster without doing so.
The long springs can easily be removed with a pair of needle‒nosed pliers or very easily removed with a pair of hooked‒needle‒nosed pliers.
Push in the spring-plate and twist the flat-ended nails out of the lock position:
Straighten and remove the pin holding the top of the rear shoe on the peg:
Installation of new shoes procedure is the reverse from removal, with the exception, of course, of not needing to move the adjuster. Just assemble and install the shoes and components with the adjuster at its loosest setting. This allows for the drum to slip on easily and the adjuster springs out to the correct position as soon as the brakes are used. The rear spindle nut ought to be brought to 29 ft. lbs. before you rotate the hub several times in each direction and then loosened and retightened to only 1 ft. lbs. Then bend the lock washer up beside the nut on one side before replacing the hubs dust cap. If the Justy is a 4X4 then you would tighten the axle nut to 108 ft.lbs. and install a new cotter pin if the old one is too soft after being reinstalled. On that note, the lock washer ought to be replaced as well if it ever gets too worn and weak/soft.
Easy, huh?
Brakes are an aspect of automotive mechanics what are known about in great detail by a large number of drivers, and for this reason, I imagine that it is one of those issues which is somewhat avoided because it is sure to spark argument or debate. I have nonetheless posted it anyway to be helpful to any novice mechanics lucky enough to have a Justy. Please feel free to add your comments, questions, or corrections below.
Danimal


 Is your car an ecvt?