|
|
Post by madmatt on Feb 12, 2014 15:09:04 GMT -5
Hagen,
Still have some jetting to do. It runs rich on the mains, enough that there is a bit of a stumble. Wideband shows ~14:1 at idle, ~12:1 1/4 throttle, ~9.5:1 at full throttle. So smaller mains are needed. As said, the slides are hanging up a bit too, which makes it a bit tough to drive. I will increase the spring pressure, and that should solve the slide return.
As for how well they work, imagine selecting any gear, opening the throttles, and feeling the seat back push against you... Something not typical of a Justy experience. I am quite certain, once I get it tuned it will be in the triple digits for HP and probably torque too. Planning on some dyno work this spring.
The intake runner is very short but it still seems to make ample torque below 3000 rpm, which is important in our application where we are all over the rev range typically. I may try tuning the runner length, but with the carbs against the firewall, that will mean some funky bent tubing... so I may just fit some better trumpets into a box and call it done.
AS for the PM test, what I sent you had an open envelope the minute I sent, so if you haven't read it... it still looks read to me. (for folks listening in we're curious why the PM "sent box" no longer shows if the recipient has read the PM or not...
|
|
|
|
Post by gearheadeh on Feb 12, 2014 18:41:49 GMT -5
Glad to hear that the carbs are a definite improvement. As far as tuning the length I have heard
that if you leave the carbs where they are and add velocity stacks before then that it relates to the tuning effect the same.
That should simplify things if you Can add bent tubes from a manifold or individual air cleaners.
I opened the p.m. now.
|
|
|
|
Post by madmatt on Feb 12, 2014 22:24:03 GMT -5
As far as tuning the length I have heard that if you leave the carbs where they are and add velocity stacks before then that it relates to the tuning effect the same. That should simplify things if you Can add bent tubes from a manifold or individual air cleaners. Yep, that would be the plan, but then I need to put a plenum on top of the motor (or somewhere). There is thought that a hood scoop with runners leading to a box on top of the motor, poking out of the hood scoop might work. But that is all hunting for the last little bit. I'll get it "more dialed in" drive it, and see if I need more... PM show unopened in recipient box, but not in sender. Your reply was "unopened letter" icon (til I opened it...) |
|
|
|
Post by indkid87 on Feb 18, 2014 13:49:20 GMT -5
Matt,
I saw the subframe pics you posted in the other thread and it made me curious.
Are you running a full skidplate that covers the whole bottom of the engine or just a beefier one in the stock location?
I'd like to add some oil pan protection, but I haven't really found a good way to do it yet.
Thanks, Dave
|
|
|
|
Post by madmatt on Feb 18, 2014 22:47:35 GMT -5
I have a full skid plate for the engine/transmission. I looked, but unfortunately I don't have any pics of it installed! It works really well from a protective stand point... we've pretty much driven on it when the ruts are really deep. It also too a HUGE rock blow on a jump landing years ago. Bent it up but I managed to hammer it back. There is the 1" box frame at the front, and then a 2" box at the back. The front is welded to the trailing link mounts so the whole suspension comes out as one. Maybe silly but it was done fast years ago... The rear mount is welded to the engine subframe. I don't like it, as it loses almost 2" of ground clearance at right at the firewall. It is planned to be changed... Again done fast back when we first ran the car. (Car went from street car to first rally in just over a month...) In this pic you can see the front frame and the 2" box steel at the back. The actual skid plate is steel, and made from 2 sheets, welded transverse to the car, with a sling bend so it follows the contour of the engine subframe. Then there are gussets that run it's lenght. It is HEAVY, I think it's 1/4 plate, or close to it. If I re- work it, the front mount will stay the same, except I'll add some angle so there is a lip it slides into (right now you have to hold it in place while you thread the bolts. Makes service a pain if it needs to come off (I can change the oil though without removing it). I might make it mount up to the body rather then the sub frame at the back. Then do it out of aluminum.  |
|
|
|
Post by indkid87 on Feb 19, 2014 12:47:14 GMT -5
Thanks for the info Matt. I might have to steal some ideas from you, I'd like to try to sacrifice less ground clearance though.
1/4" steel with gussets?! Wow
Is that rear support attached to the longitudinal brace or the subframe itself? And is it welded or bolted on?
I'm asking because we have a new rallyx league opening up that sounds like it's going to be more like a rally special stage. No cones, in the woods, much longer lap times, splash down pits and other obstacles. Far from the prepared oval track I'm used to, so now I'm more concerned about protection and keeping the mighty justy cool and running. Also I'm not sure my low-pro summer tires will cut it.
|
|
|
|
Post by madmatt on Feb 19, 2014 13:11:31 GMT -5
It's probably not 1/4 but it's heavy, thicker then 1/8th... That 2" box tubing is welded to the longitudinal "engine support subframe thingy" If I did it again I would do this: Where the red box is a pick up welded to the body or the suspension subframe, not sure yet. I thought about just moving my 2" box up, but the exhaust runs where I painted the green line. Given the MASSIVE 1.75" ehaust on the beast  it needs a bit of clearance there and the pipe pretty much rests on that 2" box I welded in now. 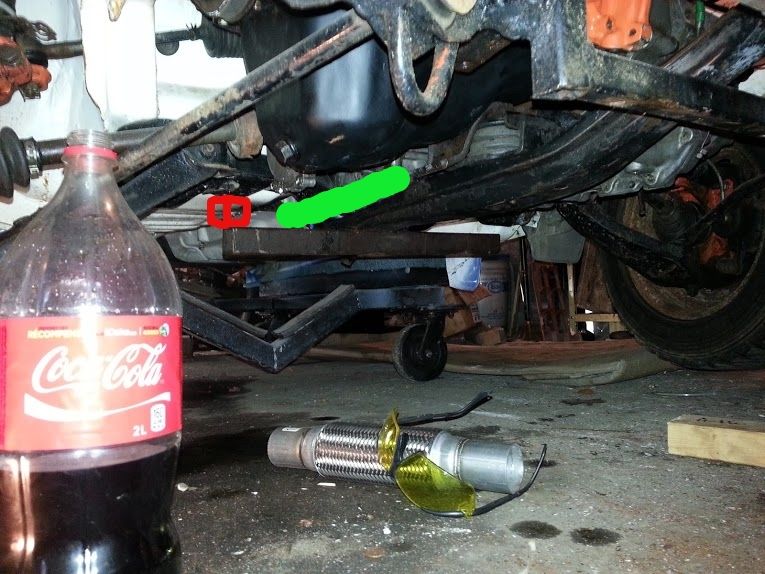 If you can find 13" gravel tires, they are amazing compared to anything else in gravel... Firestone winter force hold up not bad, or a set of Old Hakka 1's or Hakka 10's... |
|
|
|
Post by indkid87 on Feb 19, 2014 13:32:36 GMT -5
Ok, I see what you did now. I'd rather mount to the subframe than the body. I also forgot about the exhaust, I'm now running 2" with a wrap on it so that may cause some clearance issues. I'll have to take a closer look when I have time, right now I have other things to finish before the start of the season on the 9th.
I used to run 155/80r13 winterforce. They were amazing in snow, but I found them way too tall, skinny and spongy for our clay track and ice racing. It made the car really unpredictable, they would fold over, load up and then snap the car around in corners.
I fear that 13" gravel tires will be a bit out of my budget, plus they would bump me up a class. So I'll probably look into lower profile snow tires.
I have no clue what track conditions are going to be so I'll probably pack all my sets and go from there.
|
|
|
|
Post by madmatt on Feb 19, 2014 15:40:23 GMT -5
Found another that shows the front mount better... 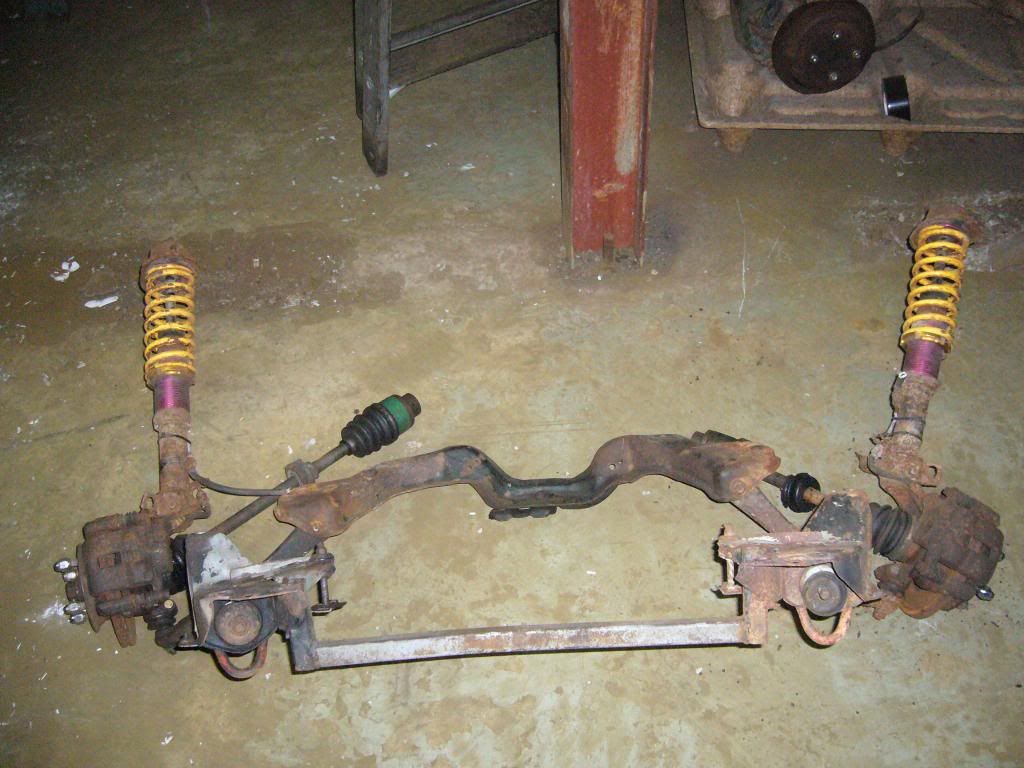 |
|
|
|
Post by gazaking187 on Jul 1, 2014 15:08:07 GMT -5
What shocks are you running in the front? The purple and yellow ones?
|
|
|
|
Post by madmatt on Jul 1, 2014 19:31:22 GMT -5
|
|
|
|
Post by gazaking187 on Jul 2, 2014 8:09:45 GMT -5
Okay thank you.
|
|
|
|
Post by southerner on Aug 17, 2014 7:27:40 GMT -5
Whish i had your capacity to do everything myself ! congrats !
|
|
|
|
Post by madmatt on Aug 27, 2014 18:09:03 GMT -5
So... I finally had a chance to right the wrongs of Tall Pines 2013... Jeff took the car after Pines, as a bent rally car in the garage means I get little work done, and I had a lot of work on my plate last winter. We pulled the car to my parents cottage, and I spent a couple of days and 45 metal cut-off of wheels cleaning out the mess. Here's a pic of the left side wheel, bear in mind this is after I had spent 20 min on stage trying to straigthen the control arm with a ratchet strap and a BFH. I had managed to get the tire clear of the body, when I started the rim was tight to the body, so I managed quite a bit in the field...  Here is the other side.  It's made worse by the fact the left tire is pulling out so it pulls the right tire too, but the issue is not only was the control arm bent, the whole subframe had shifted. In true Justy style, I rigged the red-neck rotisserie 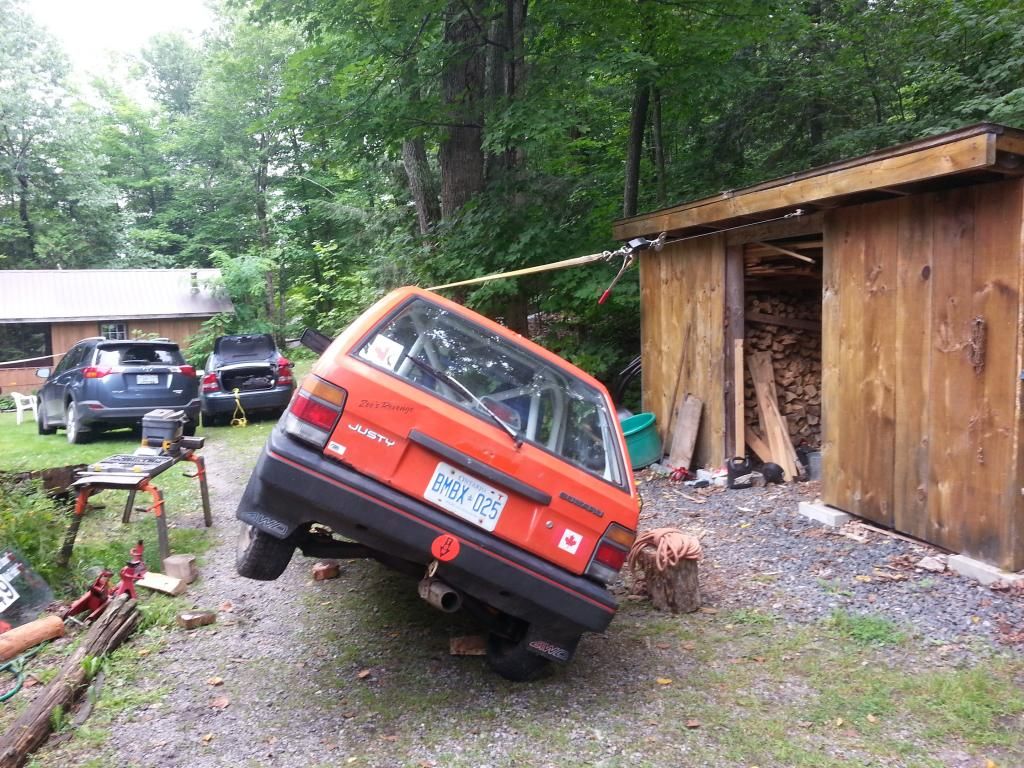  Hmmm that wheel is kinda out of alignment. 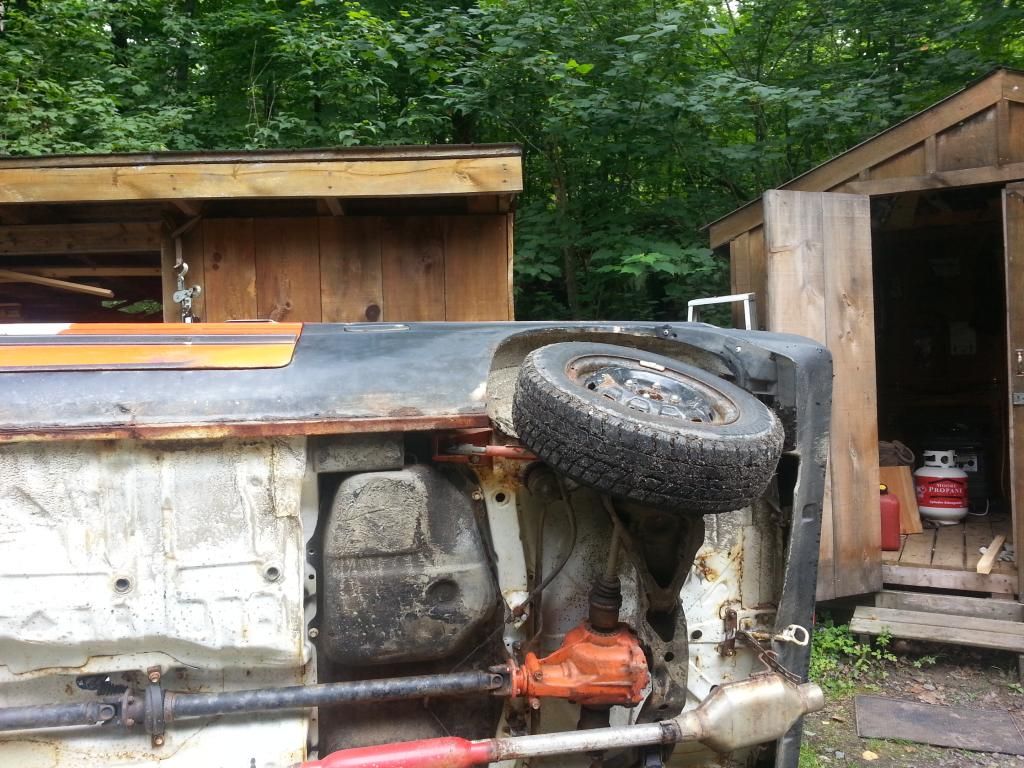 The real mess... 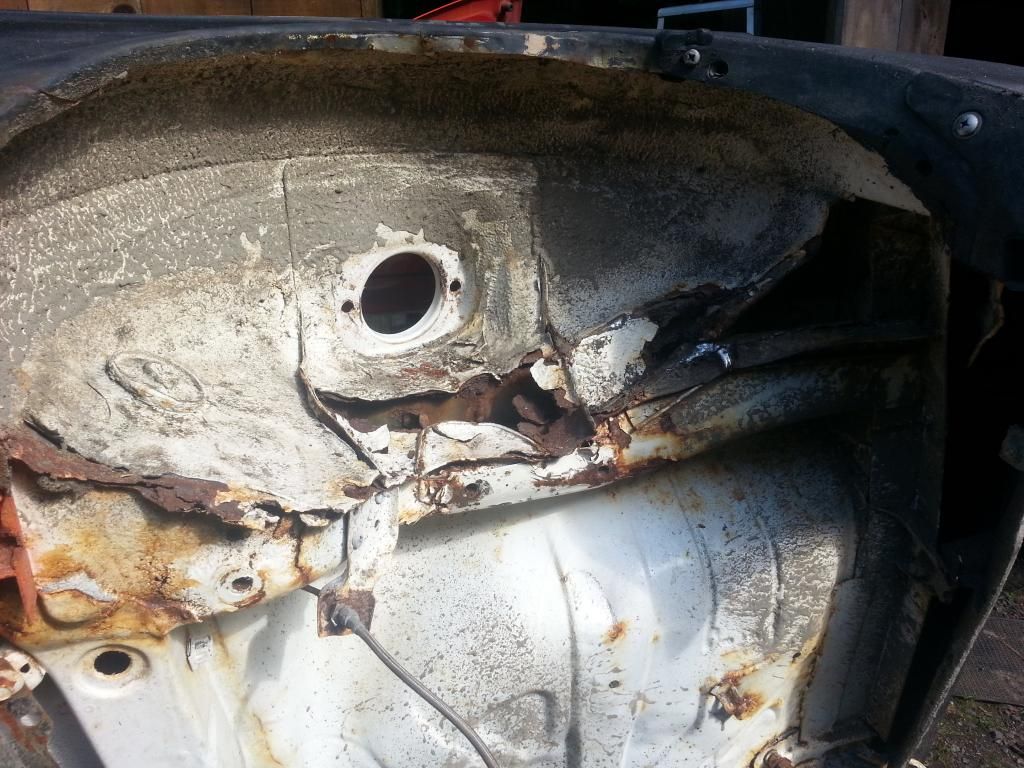 Back in 2010 I added new steel to the area BEHIND the subframe mounts, but didn't add too much to the mounts themselves... duhh so I cut out the mess. 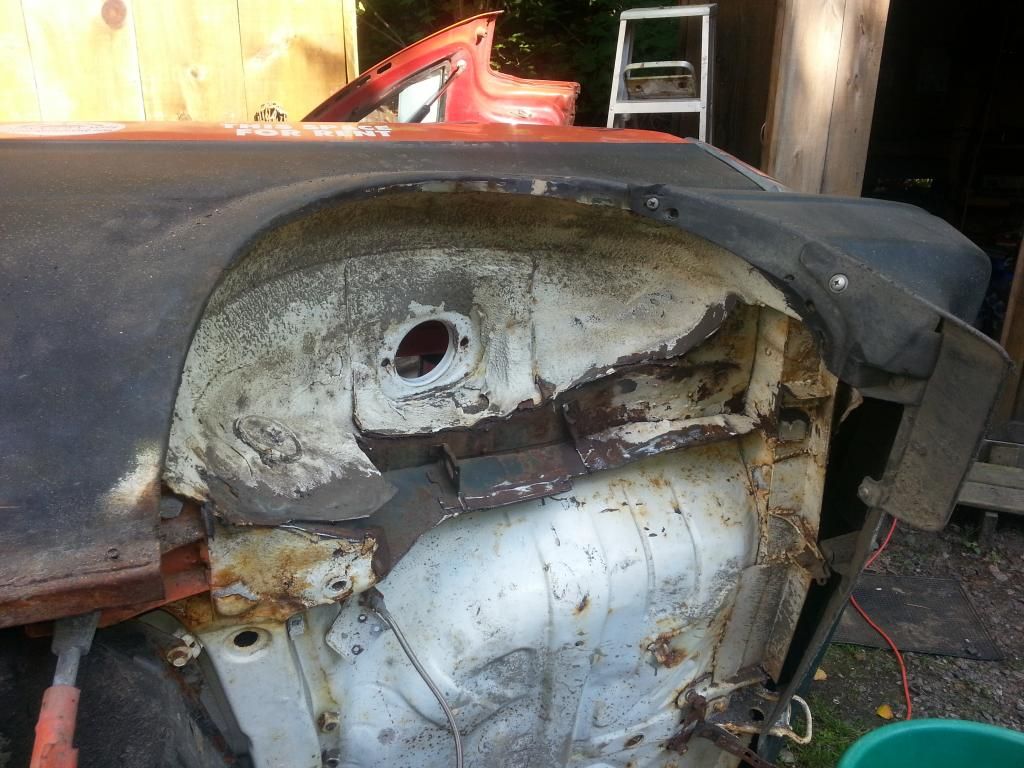 And took some 2x1x1/8" box and built new rails. (Edit: I should add in I did not leave the cut section open, that triangle was boxed in with more 1/8" steel so the 1x2 is a complete box section)  both sides. 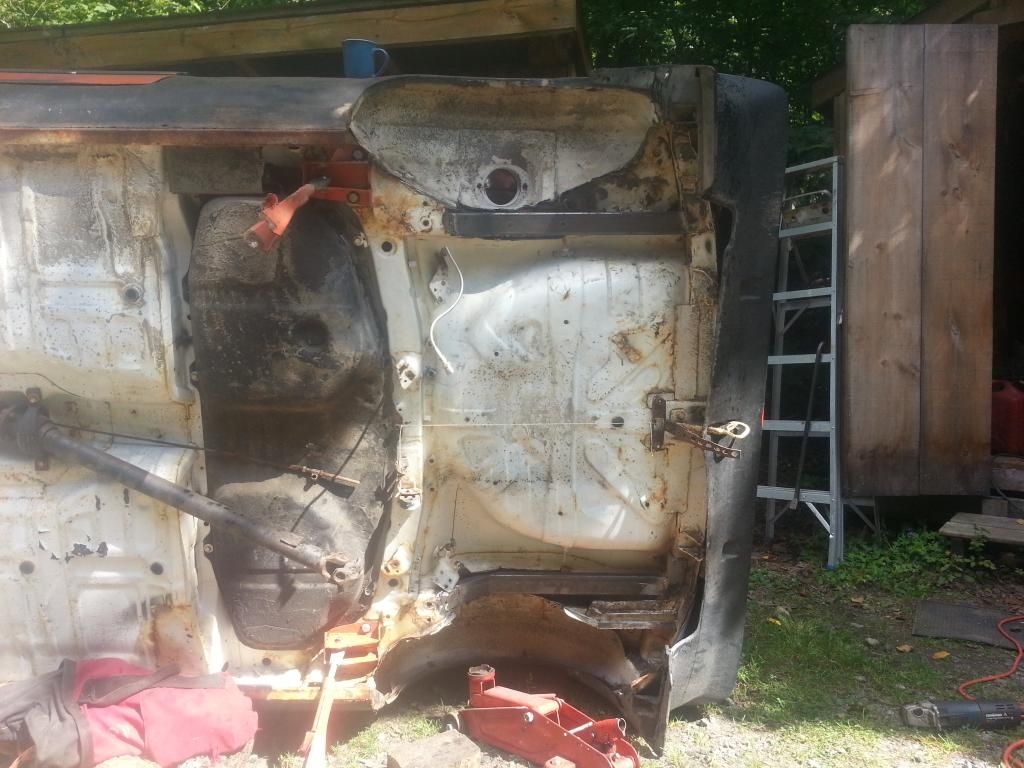 Bolted in a whole new subframe, and dropped it back on the ground. 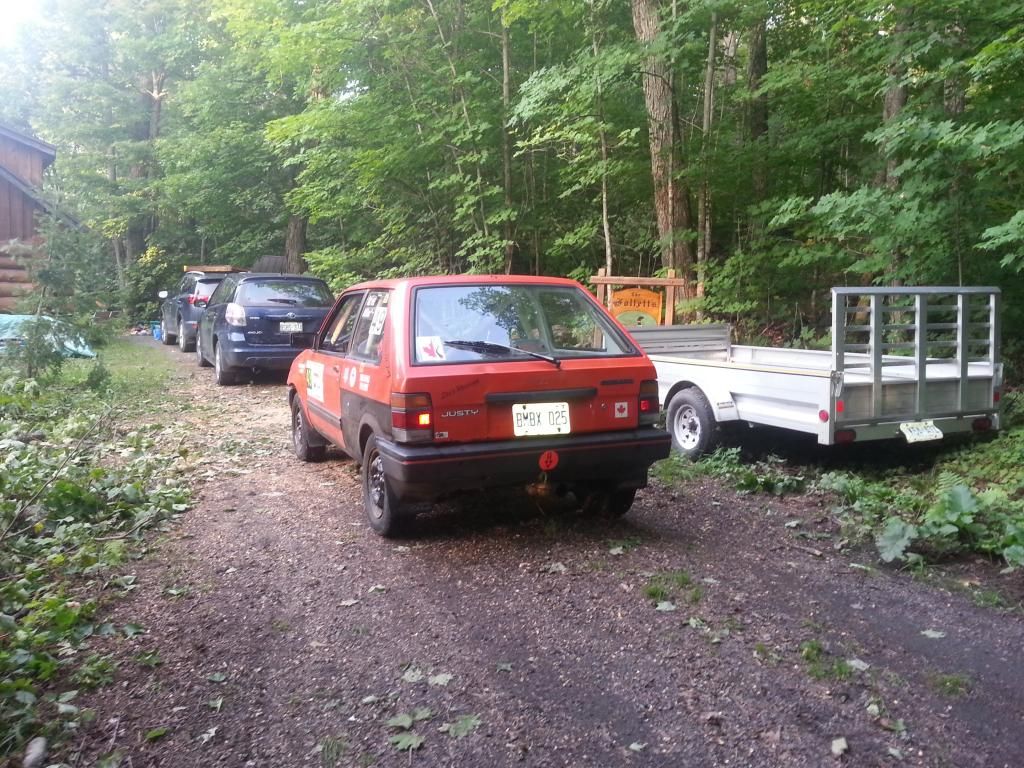 Still some work to do, but it seems to drive straighter then before |
|
|
|
Post by southerner on Aug 28, 2014 10:07:38 GMT -5
I like how you pull that Justy apart and back on like it was turning on and off the computer..
|
|
|
|
Post by madmatt on Aug 28, 2014 14:04:55 GMT -5
For those interested in the triple carb set-up... The really good news is that the new motor pulls awesome on gravel. I was really struggling on the ice/snow last fall, and Pines was the first time really driving the car more than around the block since the rebuild of the motor...So I thought it worked okay, but the tuning issues (wouldn’t settle below 3000 rpm at idle, still a bit of a roll on throttle bog…) kept me from really getting to understand what it could do. However, a few runs up and down the blind section of forest road that ends at my parents cottage says, if I can fully straighten out the car again, it will be awesome, er well, better than a stock Justy |
|
|
|
Post by madmatt on Nov 19, 2014 0:31:19 GMT -5
I finished up boxing in the rear subframe moutns... and a bunch of other stuff. Pics aren't great. but painted it looks better. 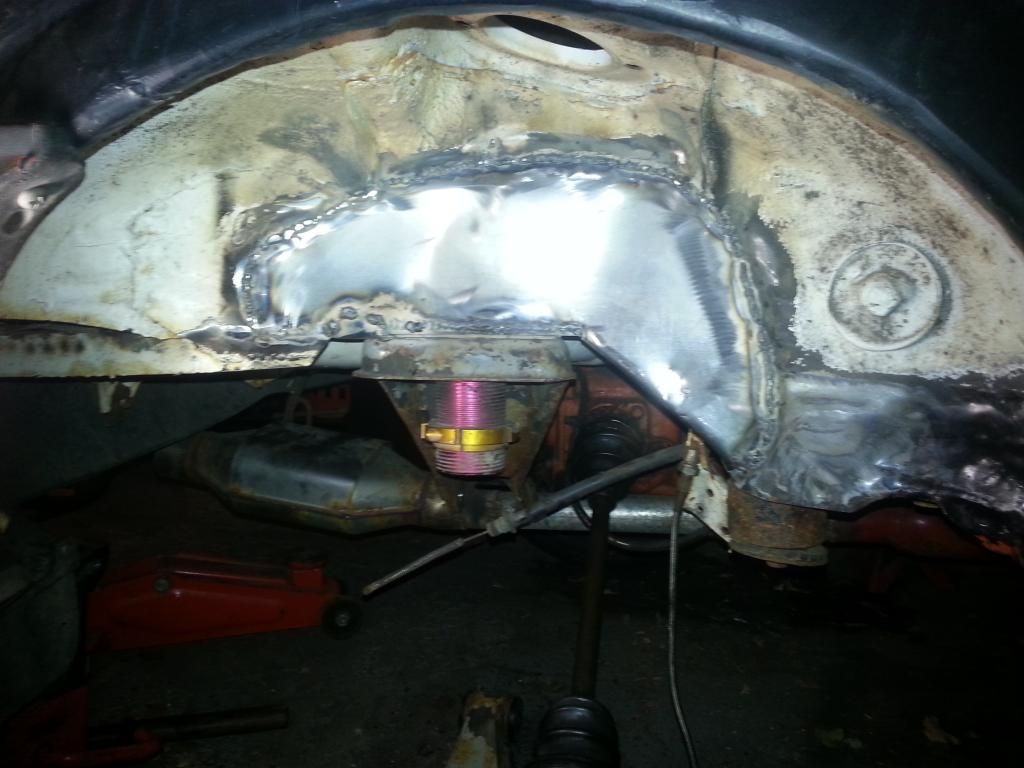 Then finally a chance to go out and run the car. Whoo who! What fun. Still pretty nervous, having driven it off the road the last time I was really in it… so kinda gun shy. Little coolant leak from intake manifold on start-up, but that went away, and then so did my rapid heart beat. Oil pressure only 25-30 at idle, but comes up nicely to 40 range. As of Saturday, I was still way to rich on the main jets. Tried to locate another set locally Saturday with the hope of spending some time fine tuning Sunday, but no luck. So with brain wave around midnight Saturday (with an 8 am departure for the “tuning session”) I filled the jets with solder, and commenced trying to redrill a couple sizes down. I found the best technique was to fill the jet, then insert the bit with the solder still hot. It would cool, and I could pull the bit out smoothly. This way the solder sweated out quite nicely from the chamfered ends of the jet and just stuck to the jet hole itself. Plus, I was no longer worried about run-out on the bit causing my 1.28mm hole to be 1.4x or whatever… Finished Jets 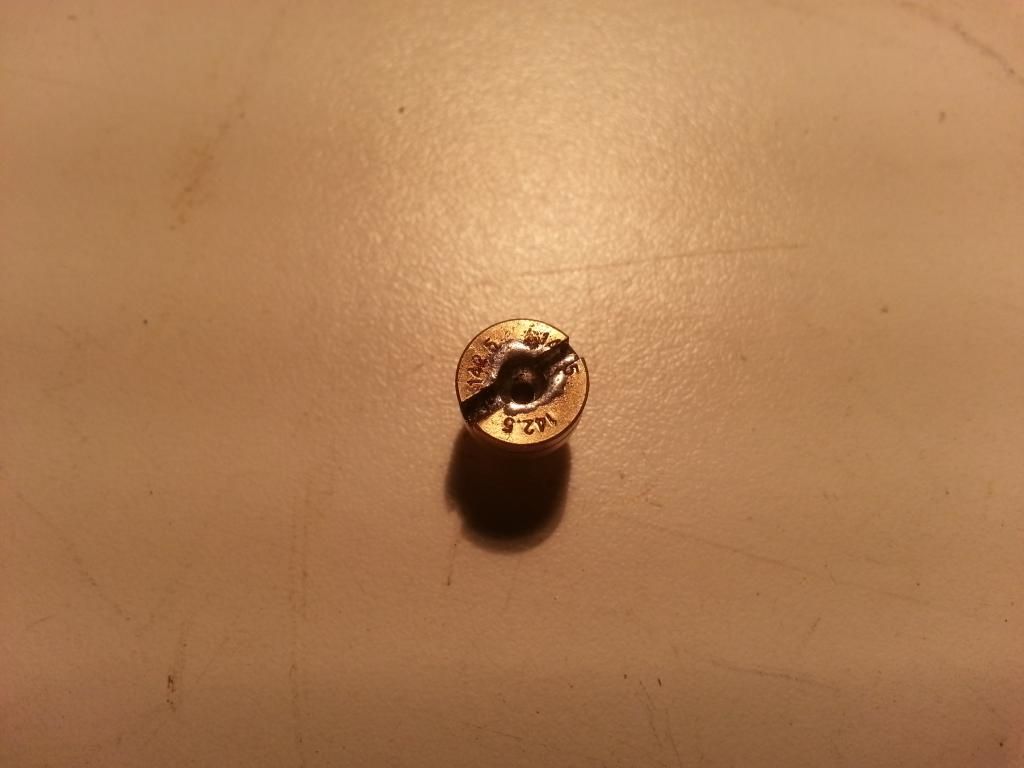 Got that finished up around 2:30 am, had a beer and called it a night. Woke up to snow! I really wanted nice gravel for consistency, but this is rally right? Let’s go. Took too long to get to the site, but eventually we made it. A friend came along and brought bagels (real ones, fresh Montreal style)… yum. More coffee, and away we went. First couple of runs up and down the road, the domesdayer in me almost took over. I figured Pines was out and there was no way this contraption was going to work. After about a ½ hour of playing I was more comfortable, and starting to let it open up. Hmmm. May need a rev limiter It pulls hard through 7000 rpm! Would easily keep going, from the feel, not sure how far, 8000? maybe more. Factory redline is 6. The Stock motor would “rev” to 7000 but I would always shift by 5500 or 6 cause the power just fell off. Now it is still screaming for more. Maybe once we have a few stages under our belt, and at least half the rally over, I’ll let it go a bit more. Last thing I wanted to do was blow it sky high 2 weeks before we go. Now full throttle is around 12:1 air:fuel on the wideband, occasionally it jumps down to the 10 range, not sure what that is about. But At Pines last year we were 9:1 full throttle, with a terrible mid throttle/3000 rpm bog. (I actually blame the off in part to no power when it bogged out, then bam power on and, oops.) Now it is nice and smooth all the way through. I can cruise, and just put my foot down with no hesitation. Or… Just lay the welly to it I meant to get some video of runs to record “data” but forgot stuff… including the suction mount for my phone. After my friend left, I thought, Dang! Well I can hold the phone and make a short run… Having a hard time getting it to upload to As soon as I do, I’ll post it too. It is, awful to watch, but not too bad to listen too. Hard to shift, hold the phone and steer… so the corners suck. |
|
|
|
Post by indkid87 on Nov 21, 2014 10:26:20 GMT -5
Awesome to hear Matt. I'm glad she's running good for you.
Clever trick on the jets. A fine bit of hot rodding.
You're making me jealous, I wish I had the time and money to throw at the justy right now.
-Dave
|
|
|
|
Post by JustyRally on Nov 21, 2014 14:32:36 GMT -5
Hey madmatt what gage steel are you using to repair frame and body?
I need to get my butt in gear and start welding so i can put it back together and drive it next year.
|
|
|
|
Post by madmatt on Nov 21, 2014 17:12:51 GMT -5
Dave, I have no money either.. hence having to build friggin everything from scrap! I could have ordered jets online, but would have paid too much with shipping (my $15 budget ) JustyRally, I have been using 22 gauge, it's flexible enough to bend and form by hand a bit, and then obviously a hammer etc. I really have no metal working tools besides a hammer and a welder I need a metal brake, an English wheel, a .... |
|


 it needs a bit of clearance there and the pipe pretty much rests on that 2" box I welded in now.


 Is your car an ecvt?