|
|
Post by indkid87 on Nov 26, 2013 22:23:46 GMT -5
Well it's been quite a long time since I've posted on here so I decided it's about time to reboot it and track the progress I hope to make this winter. I started my Justy project about four years ago, my early progress can be seen here subarujusty.proboards.com/thread/2506/rallyx-justy-projectThe mighty Justy has undergone quite a few changes since then, I'll try my best to get you all up to speed. 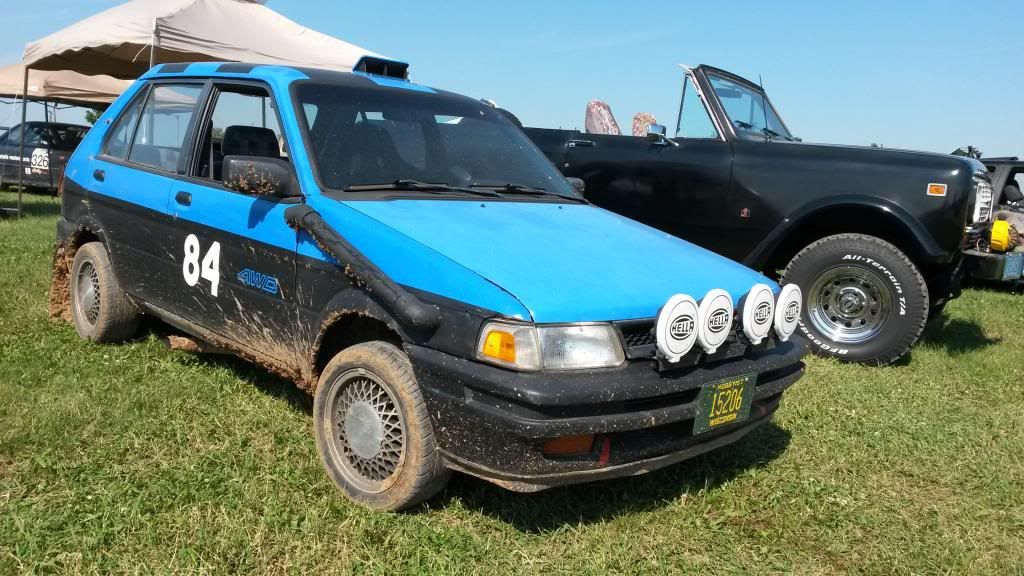 This is basically how the Justy sits now. It's hard to remember all the mods, some of the obvious ones are the snorkel, mud flaps, front lip, side exit exhaust and it finally has a good set of headlights on it. 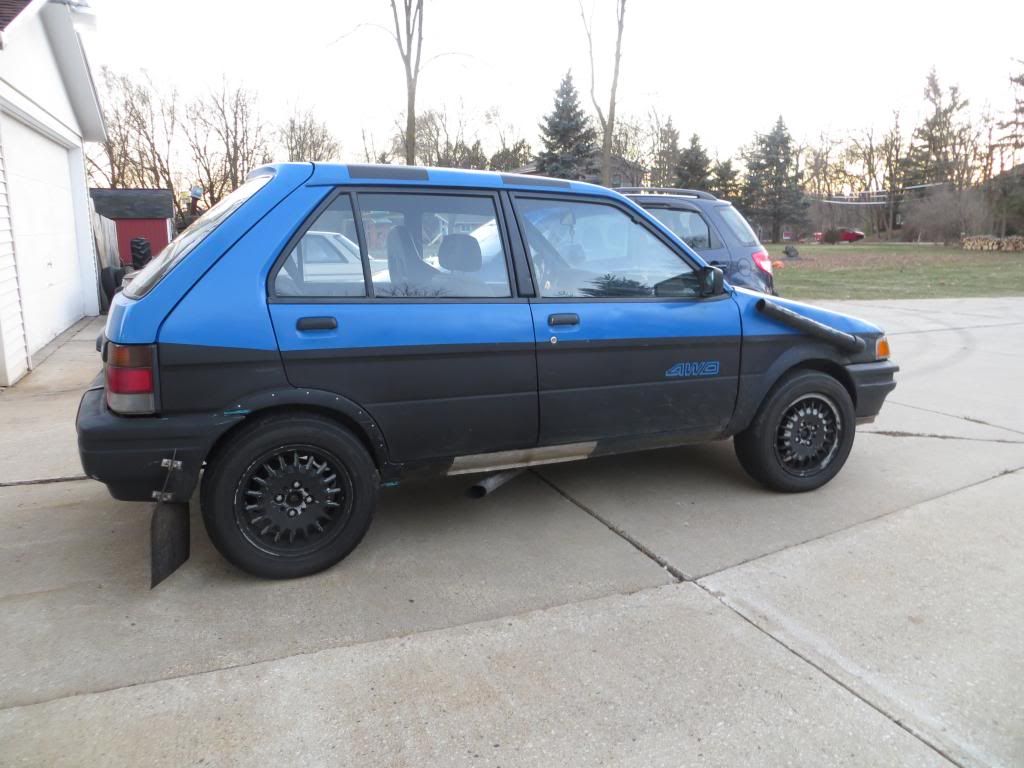 14" BMW bottle caps that need paint this winter. 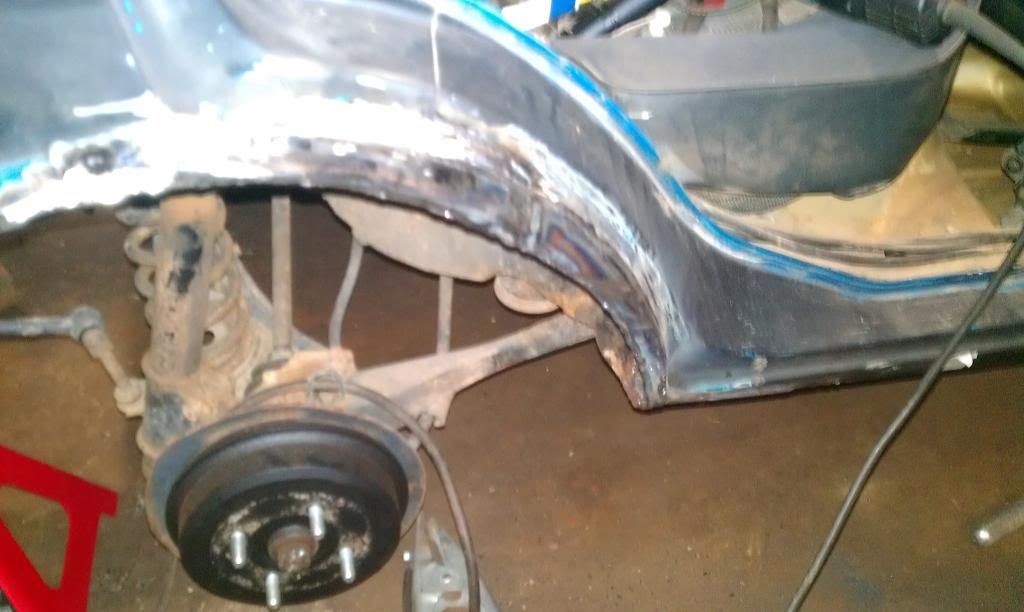 I had to do some rust repair on the fenders and rocker panels. 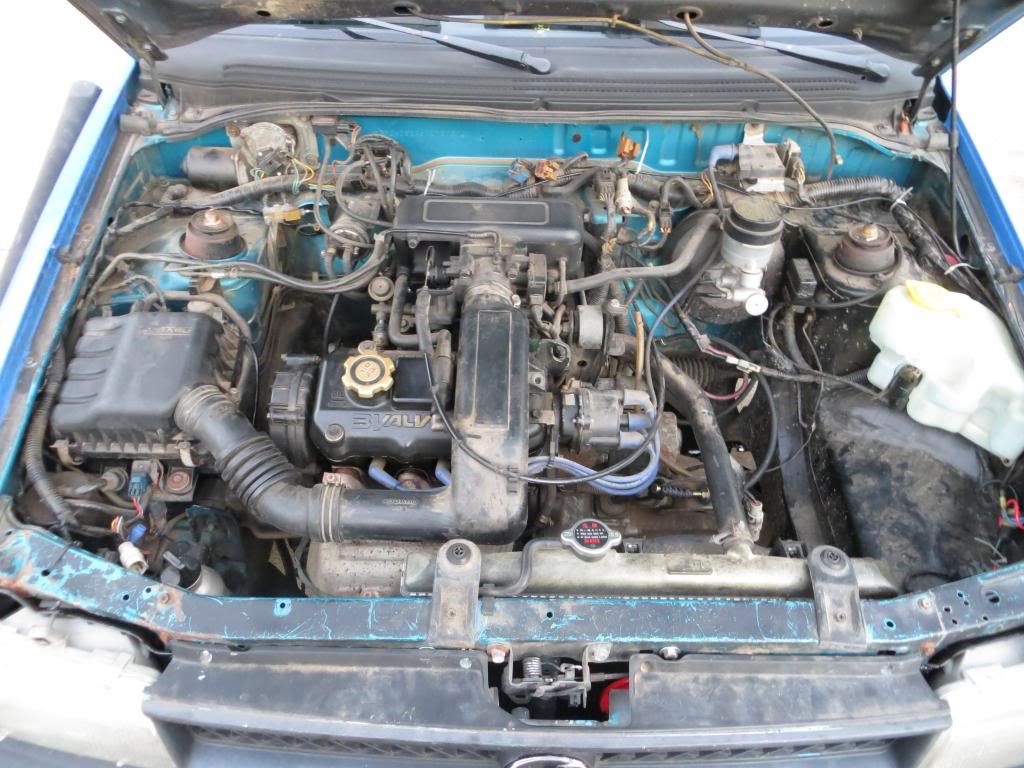 I fully rebuilt the motor, but it is still stock to stay within the stock rallyx class. 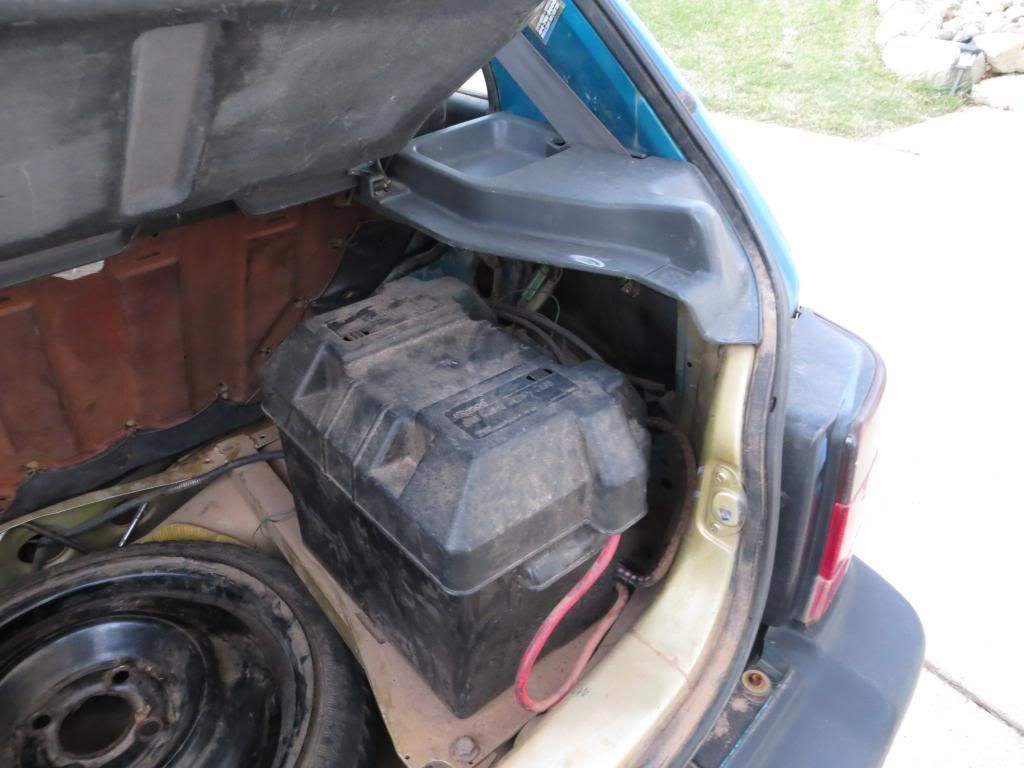 The battery has been relocated to the back. 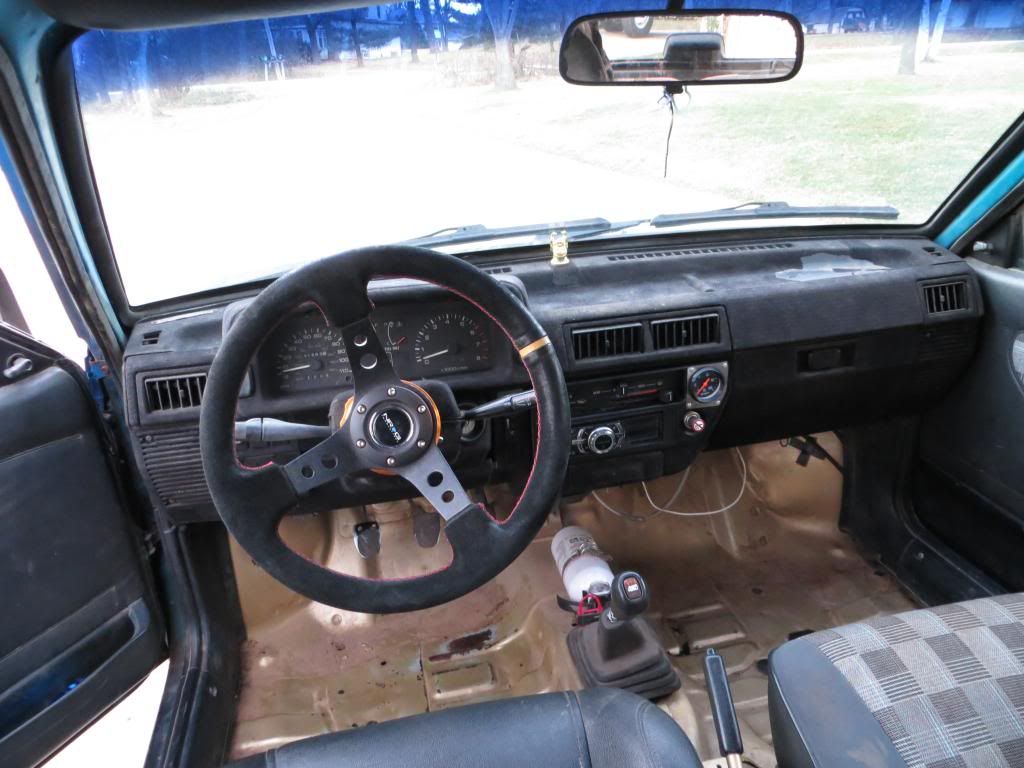 Stripped interior, flocked dash the needs to be redone, NRG wheel and quick release. The shifter has been rebuilt with brass bushings and I have further plans for it this winter. 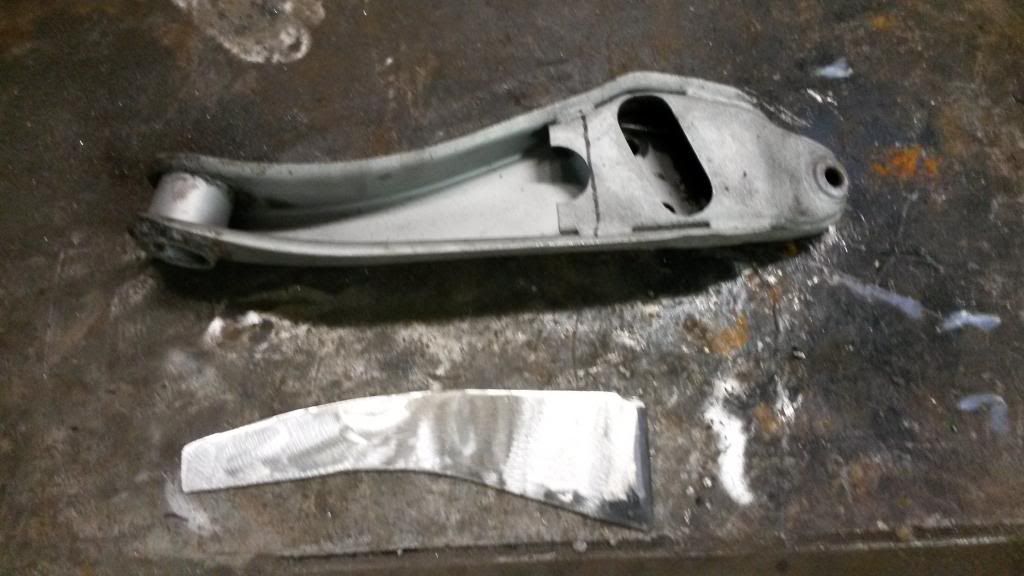 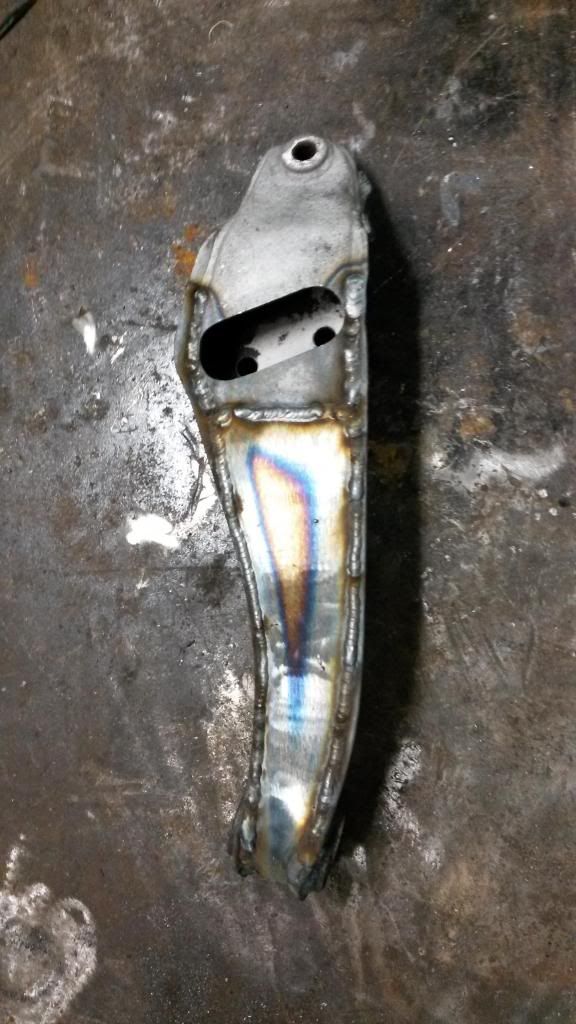 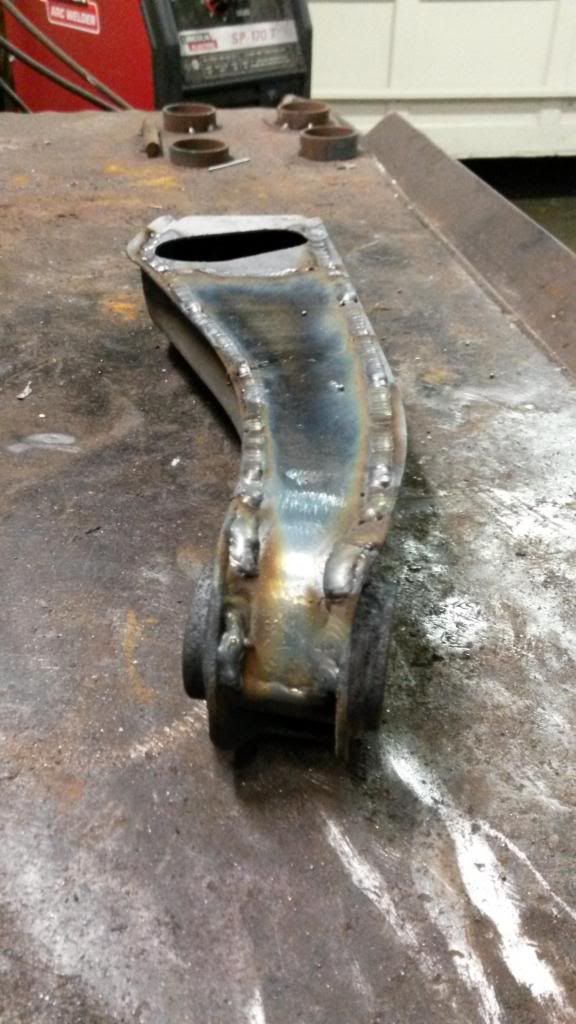 Control arms have been boxed for strength, since I've bent a few sets. 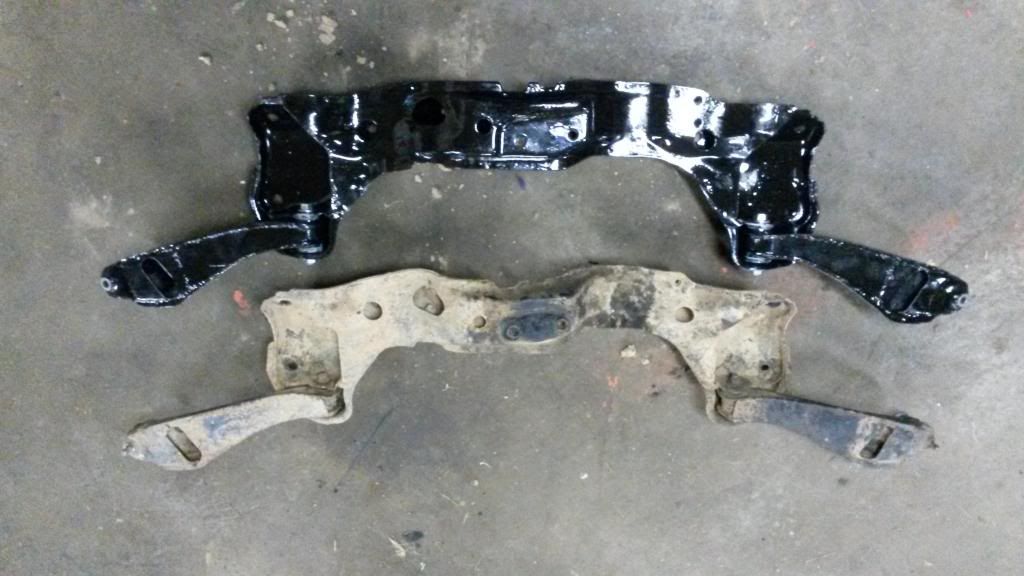 The control arms went into a refreshed sub-frame along with urethane bushings, stainless sleeves and bigger control arm bolts.   Also an important note for anyone beating on there car as I have, my sub-frame started to bend and tear by the control arm pivot, I plan to reinforce that this winter. 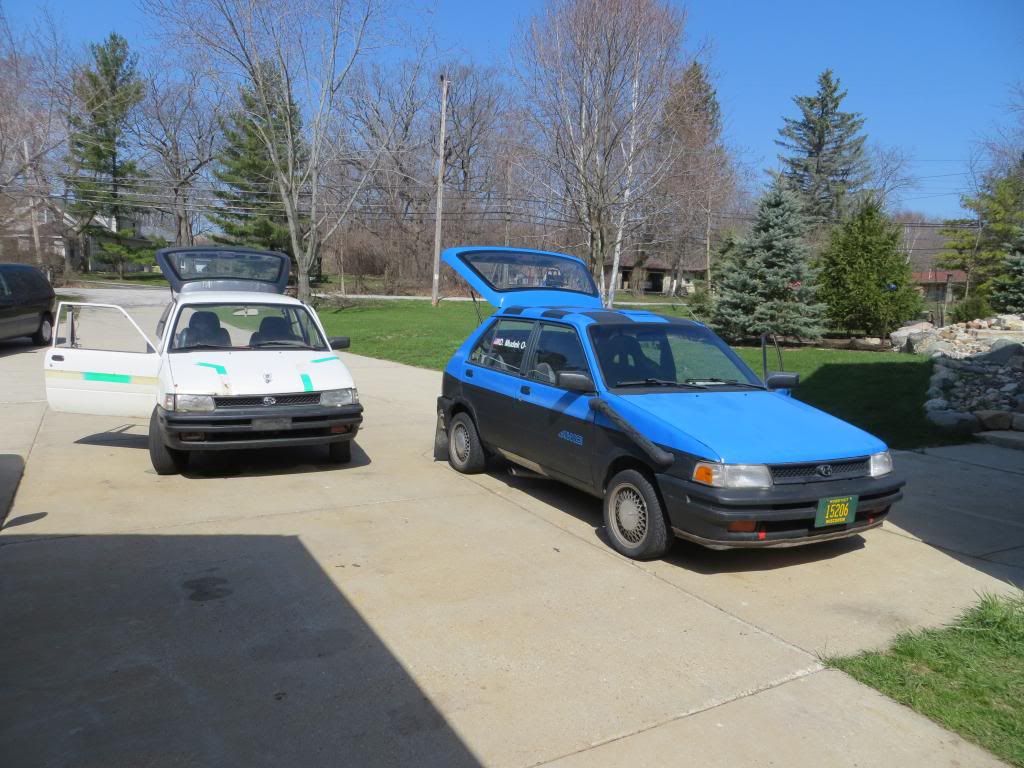 I picked up a really rough parts Justy, I'll probable give it it's own thread because it may become a wheel to wheel ice racing car down the road. Well that's about it for now, I plan to do a major refresh on it this winter. Including new paint, custom shifter, new seats, rust repair and whatever else I can tackle. Feel free to pick my brain on anything I've done, I know this Justy like the back of my hand now. |
|
|
|
Post by madmatt on Nov 26, 2013 22:50:25 GMT -5
Drive it hard!!!!
Rise of the relics!
Awesome to see.
|
|
|
|
Post by indkid87 on Nov 27, 2013 21:46:52 GMT -5
Thanks Matt, very impressive rally build by the way. Well I started installing my new seats today, I'll have install pics later, but for now I wanted to throw up a few more pics I found.  These are the seats, nothing special, but I got an amazing deal and they're definitely better than what was in there. 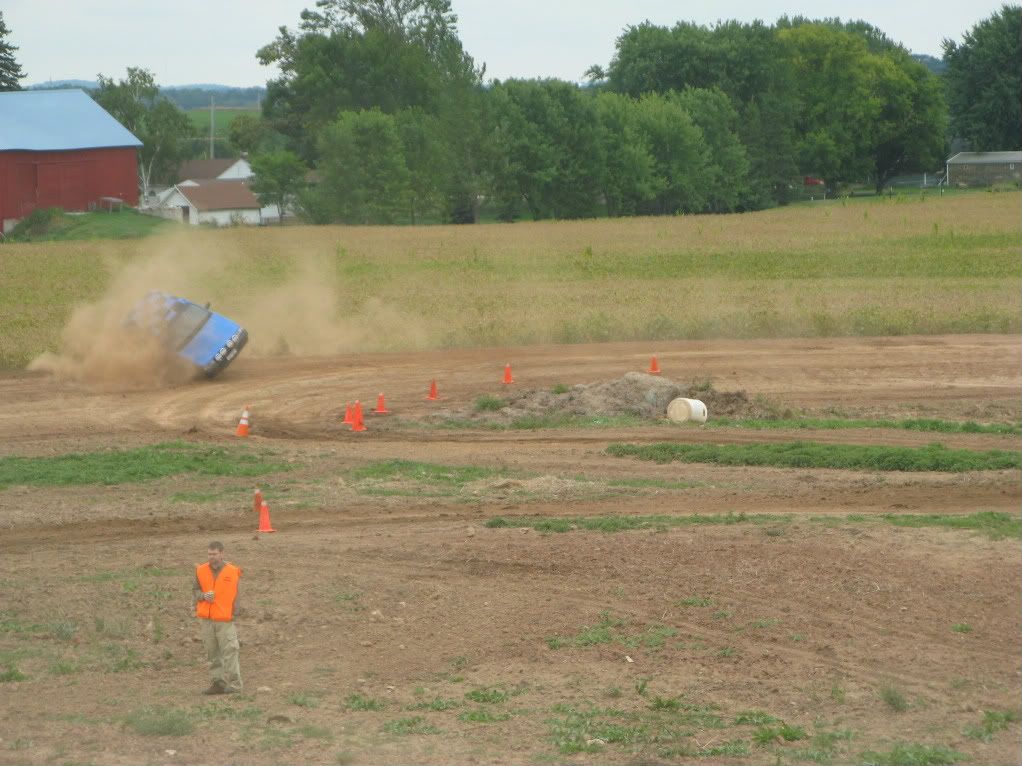 Here's me, almost rolling the car over, I still can't believe I saved it. 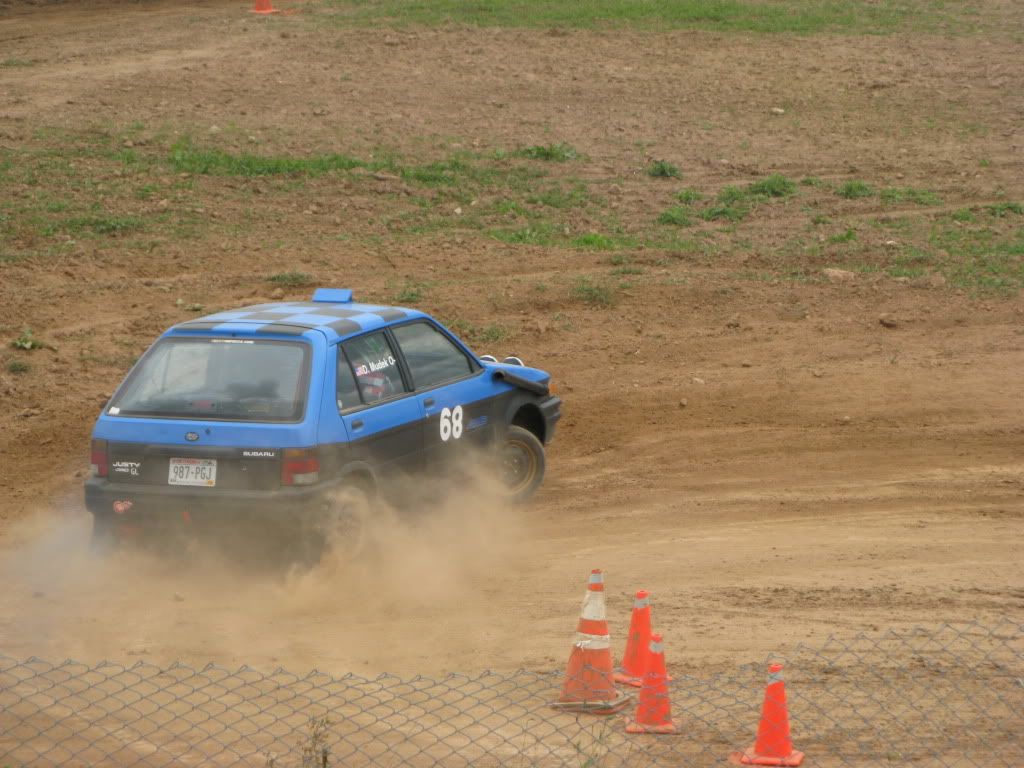 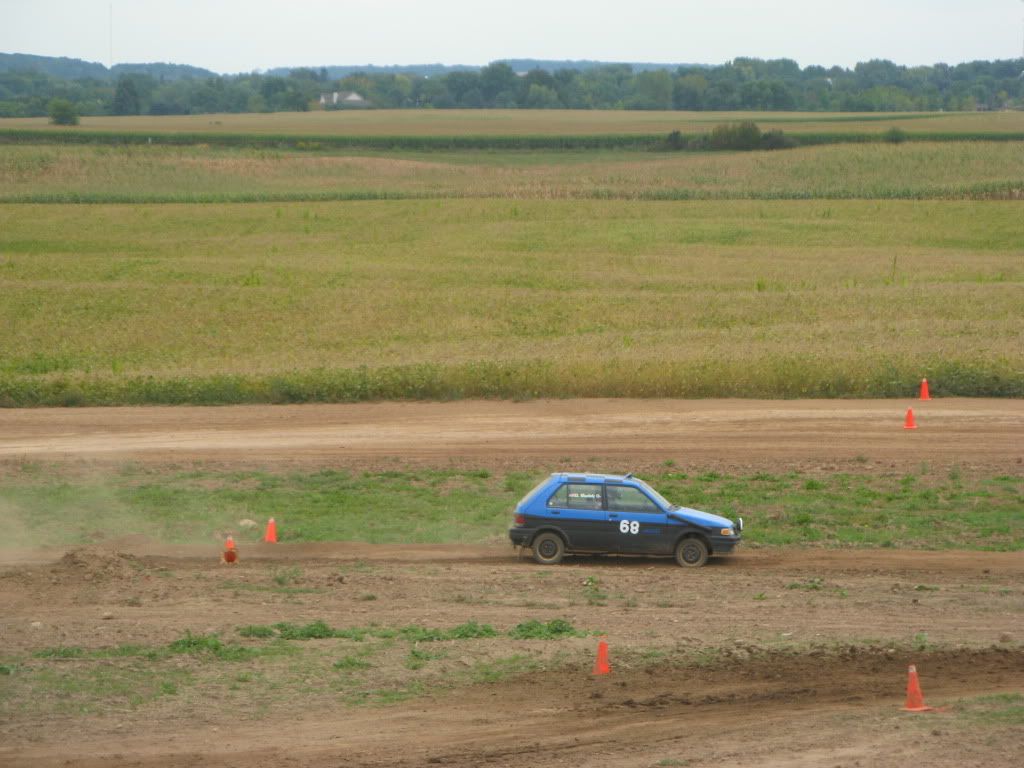 Random rallyx pics 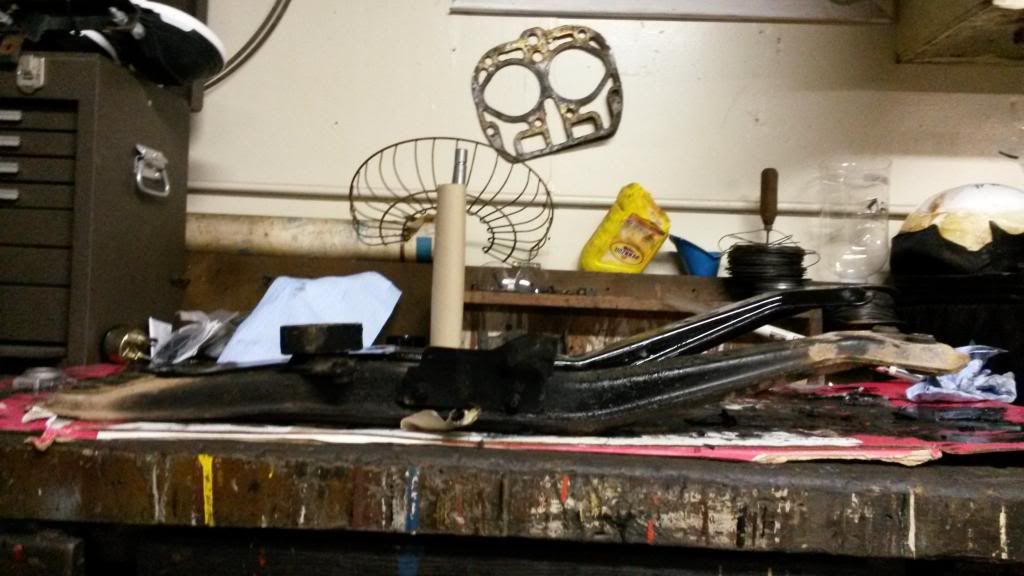 A little hard to see, but I found out the crossbar I got from my parts justy was severely bent. The bent one is in the back painted black, next to the muddy straight one I pulled out, needless to say I put the old one back in. |
|
|
|
Post by madmatt on Nov 28, 2013 1:21:11 GMT -5
Love the boxed arms! Very nice. It's on my to do list. I also like the bushing mod on the arm. Are you running a poly bush there?
Matt
|
|
|
|
Post by madmatt on Nov 28, 2013 1:22:47 GMT -5
Do you know if the gen 1 and gen 2 front subframes are interchangeable?  |
|
|
|
Post by gearheadeh on Nov 28, 2013 10:37:07 GMT -5
Do you know if the gen 1 and gen 2 front subframes are interchangeable? Matt, I do not know for certian but I can't see why they are not interchangeable. However I just found out that the motor mount by the front of the engine is different from Gen 1 to Gen 2. When swapping a Gen 1 engine into a Gen2 chassis you should keep the motor mount with the car it came from as it will bolt onto either engine but the reciever mount on the chassis is different to match up with it. In other words either chassis will take either engine as long as the motor mount stays with the car. Everybody knows that a Gen 1 engine doesn't have bolt bosses to mount the driveshaft spacer from the gen 2 chassis right? |
|
|
|
Post by gearheadeh on Nov 28, 2013 10:44:46 GMT -5
Indkid, Nice work with boxing in the lower control arms.  I can't beleive that you managed to bend that nicely painted middle engine craddle/ support or was it that way from someone else? Really interested in hearing your impressions on how the handling was affected by changing the battery to the rear, it is something I have been considering! Also, could you please tell us in more detail where you got, and what bushings, with a picture of the different bushings you used in the suspention and shifter before installation? |
|
|
|
Post by indkid87 on Nov 28, 2013 14:01:03 GMT -5
Thanks guys, glad you like my mods.
Matt: I don't know about the sub frame swap, I've never had a gen I.
Yes, the bushings are polyurethane, I'll post more info when I have more time.
Gearheadeh: The crossbar was bent when I got it, unfortunately I didn't notice until had it blasted, painted and tried to install it.
I didn't notice that big of a handle difference from the battery move, but the extra room under the hood and the circuit breaker I have in the back now are awesome to have.
I'll post more on all the bushings when I have time, I'm a designer so I have some nice CAD models I just have to dig them up. The control arms are on polyurethane with stainless sleeves and up sized bolts. The shifter's all brass, but I have further plans for it.
|
|
|
|
Post by JustyRally on Nov 29, 2013 2:05:02 GMT -5
How or where did you get polyurethane bushings for the control arms?
|
|
|
|
Post by indkid87 on Dec 4, 2013 10:26:08 GMT -5
Ok guys, I finally have some specs for you. The bushings I got from: www.polybushings.com/pages/bushingsbysize.htmlI used Part# 2045The critical dimensions are your shoulder width (F) and the OD of the smaller diameter (A) so #2045 fits. However the body length (D) is too long and needs to be cut down to about .87". I had no problem doing this with a razor blade. I simply put the stainless sleeve inside the bushing so it wouldn't fold over, marked my length around the diameter with electrical tape and slowly worked my way through with the razor. The stainless sleeve i got from: www.mcmaster.com/#catalog/119/3230/=pnu63sI used Part# 92320A27218-8 stainless steel unthreaded spacer, 5/8" OD, 2-1/4" Length The only modification you should need to do to it is to drill out the inside diameter. I drilled mine out for a larger M12 bolt instead of the stock M10, but you can choose to take the easy route if you want to use the stock hardware and not drill bigger holes in your sub frame. The bolts are simply fine thread M12's I picked up at the hardware store, just make sure you get the class 10.9 flange-heads. I think mine are about 75-80mm long. The install is fairly straight forward. Burn out the old rubber bushings and clean up the inside bore. Insert the bushings and the sleeves and bolt them to the sub frame. If you choose to go with the M12's you will need to drill out the sub frame, this must be done very carefully to insure the control arms remain in the stock position. I can take some pics of how I did this when I remove my sub frame again, but it will be awhile before i get to it. 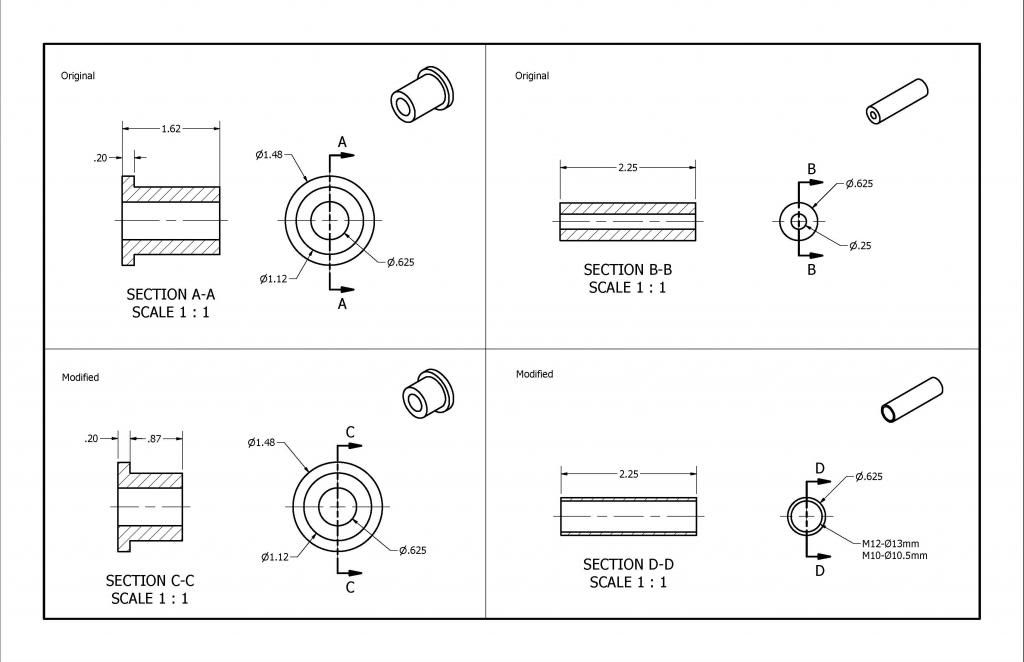 Beautiful drawing for added clarity. I hope this all makes sense. -Dave |
|
|
|
Post by indkid87 on Dec 10, 2013 22:38:46 GMT -5
I made some more progress, the floor has been repainted, the seats and harnesses are installed and I dropped the steering column a bit. 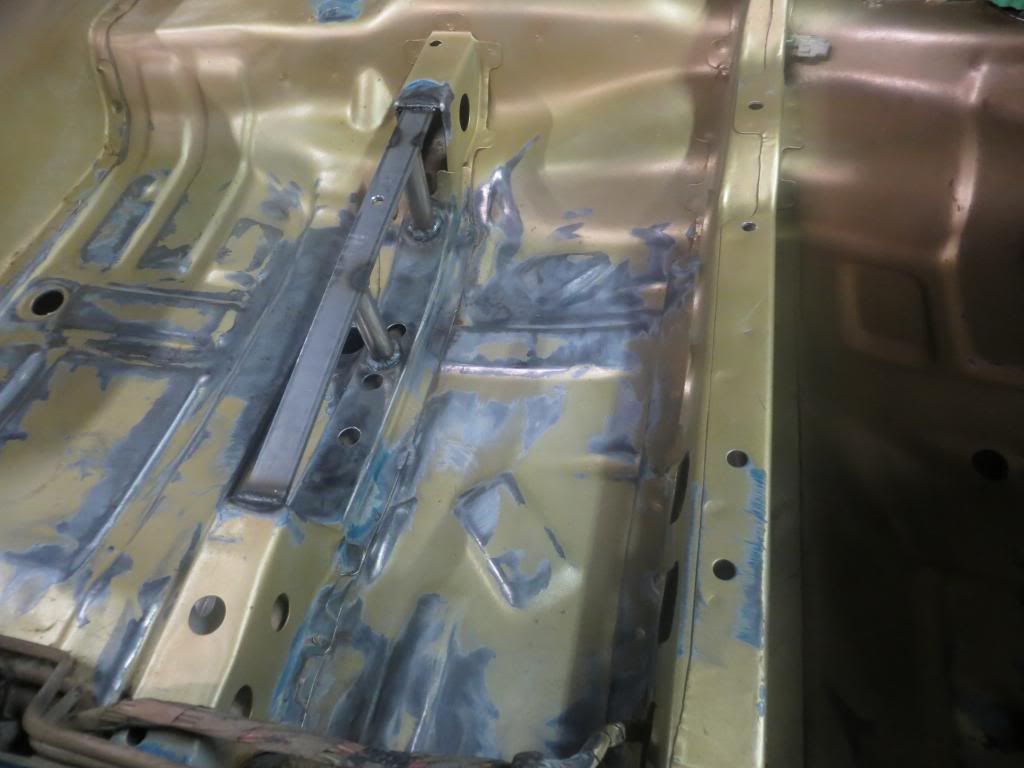 Here's some pics of the supports I welded to the floor for for the seats. They need to be mounted as low as possible to keep the center of gravity down and provide helmet clearance. 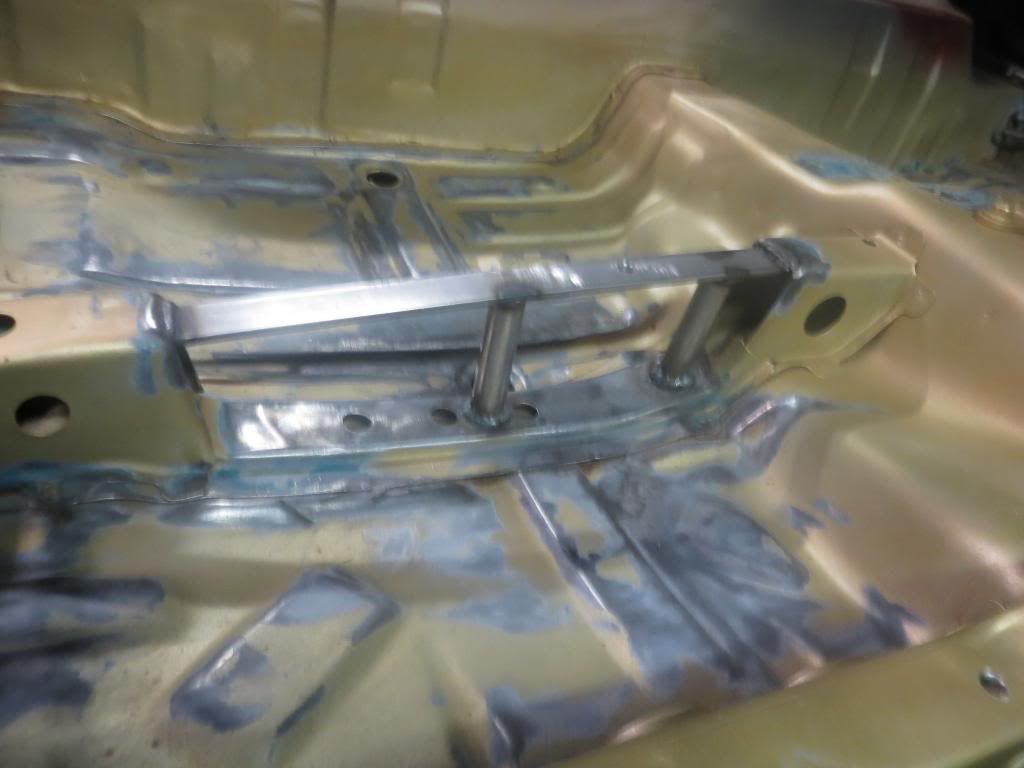 To accomplish this I moved the inside rails off of the center hump and created brackets to support them on the seats and the floor. 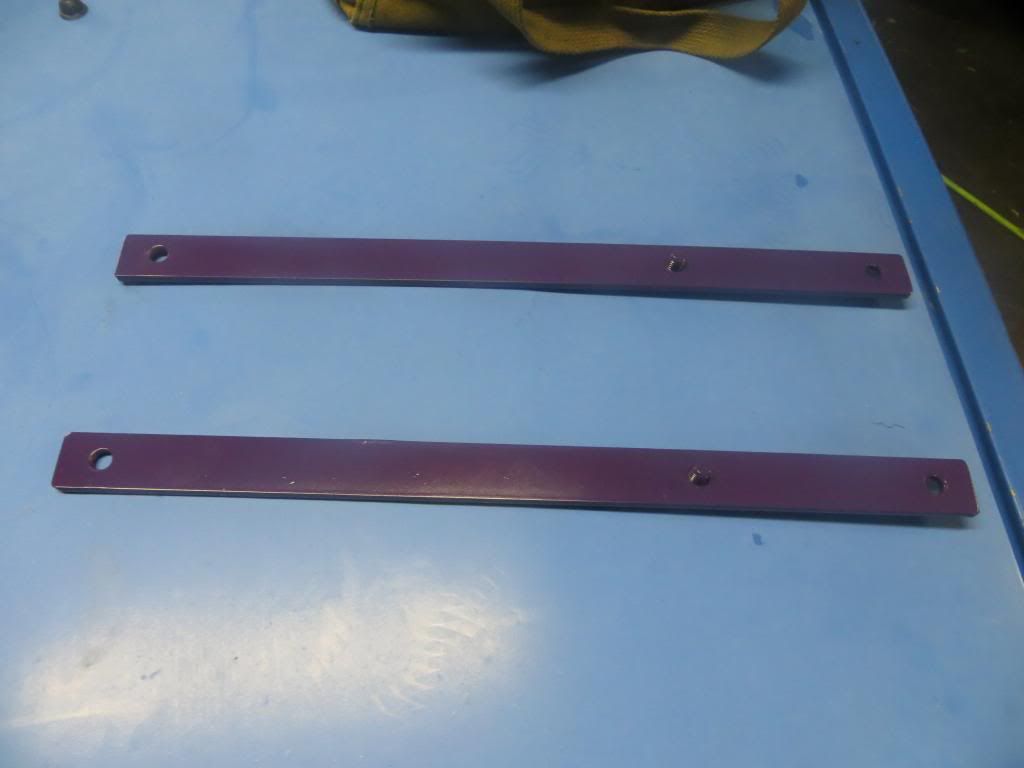 Here's the brackets for the seat side. 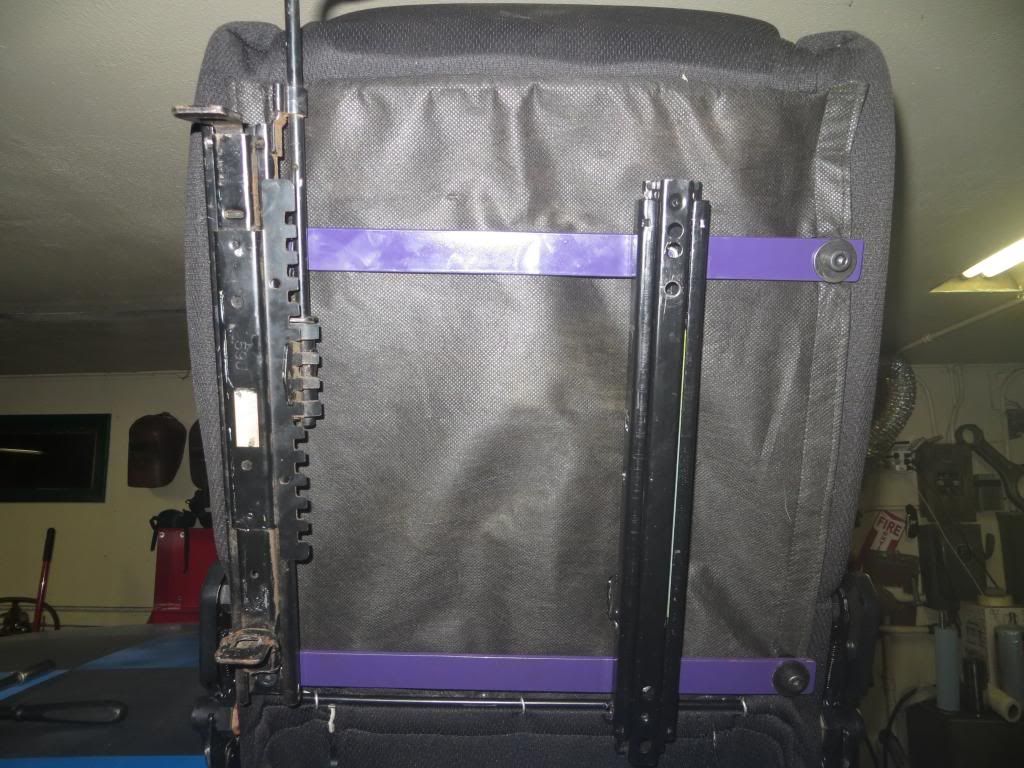 I'd post dimensions, but they really won't do you any good because most likely they'll be different for your chosen furniture. 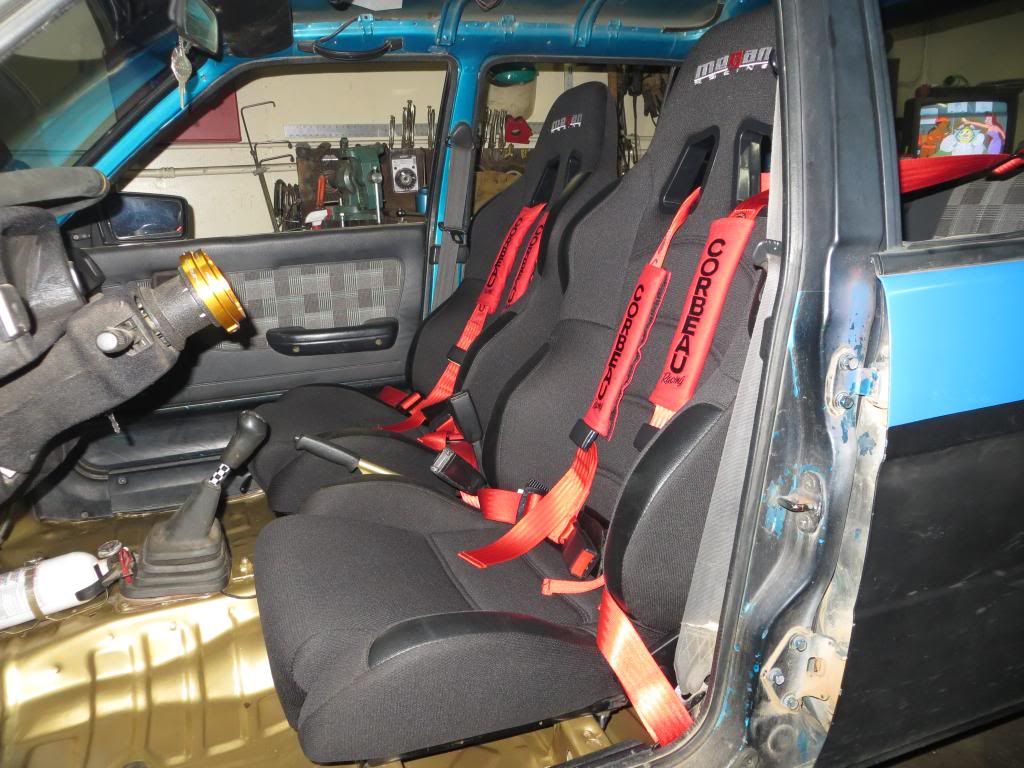 Nice, shiny, new, temporarily clean seats installed with cheesy 3 point harnesses. 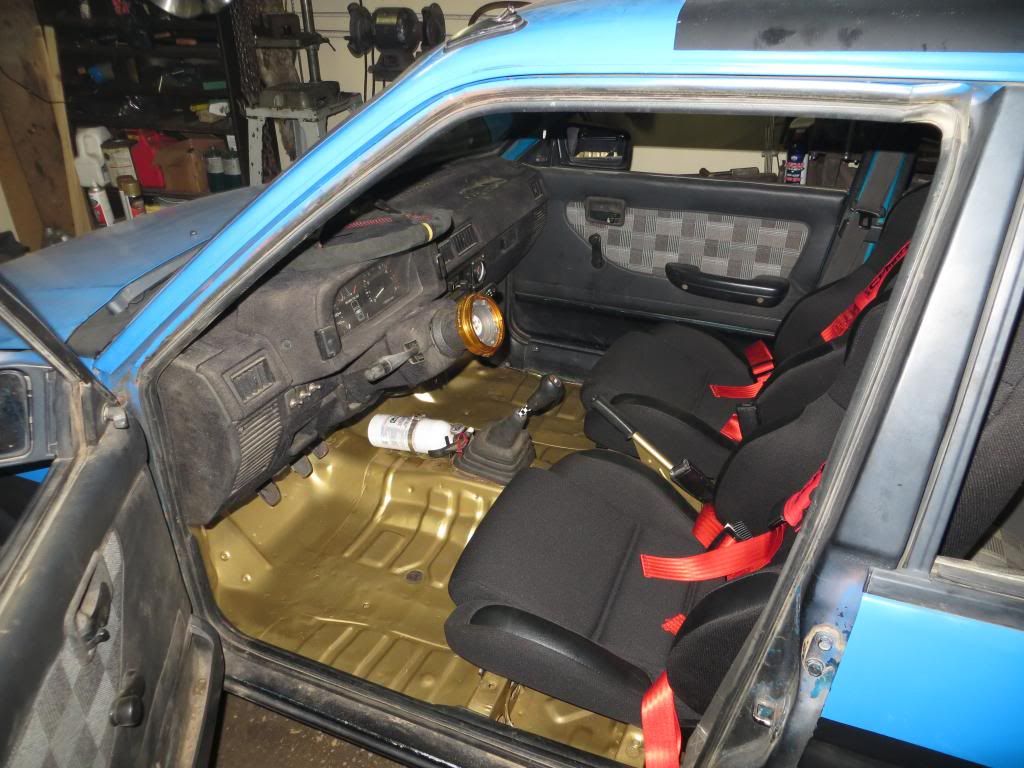 Floor looks pretty for now too. 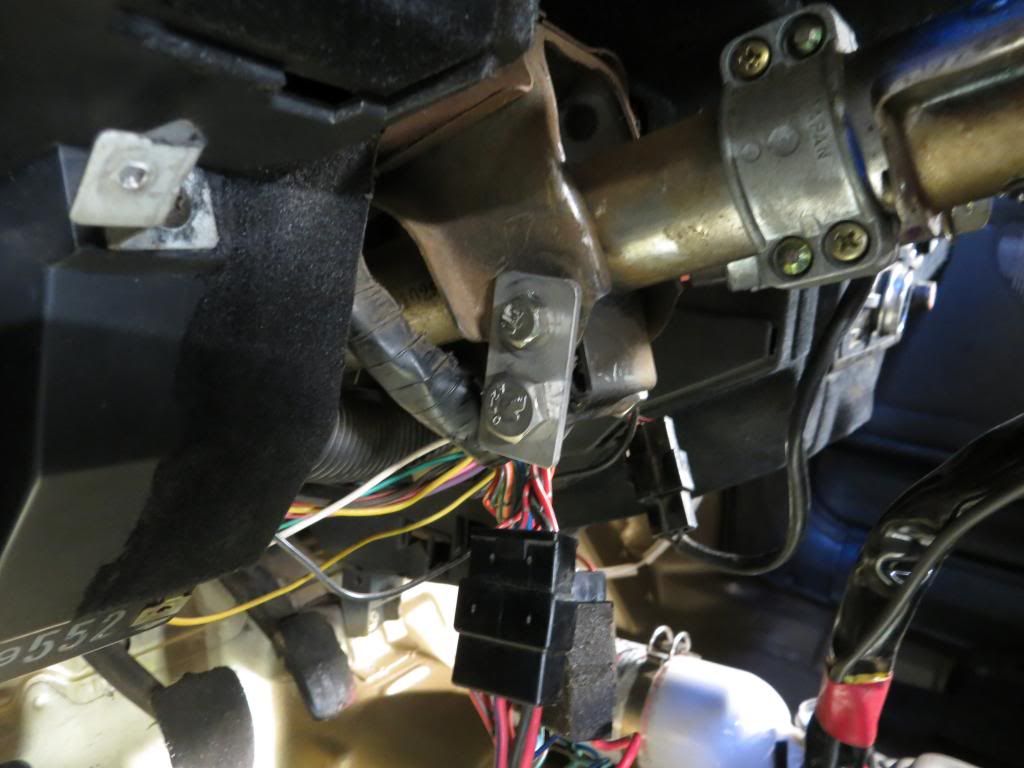 I also made a quick KISS method designed bracket to drop the column to a more comfortable level. Between the lowered seats and the extended hub it was a bit high. -Dave |
|
|
|
Post by madmatt on Dec 11, 2013 15:53:19 GMT -5
NICE.
And nice looking shop!
First, what friggin connecting rod is that on the switch panel!!!!!
oh yeah, nice Disney movie... Kids helping?
|
|
|
|
Post by gearheadeh on Dec 11, 2013 17:21:43 GMT -5
NICE. And nice looking shop! First, what friggin connecting rod is that on the switch panel!!!!! oh yeah, nice Disney movie... Kids helping? I was gonna post the same 2 questions? You beat me to it man! |
|
|
|
Post by indkid87 on Dec 11, 2013 18:35:39 GMT -5
Haha, it's my brother's awesome 6 car garage. Complete with all sorts of fantastic tools, monster press, band saw, mig, 2 drill presses, anvil etc. Most of which were acquired for very responsible prices, people give you stuff when you have a huge garage.
The con rod is for a Waukesha stationary engine, my bro works in the test lab there.
That's no Disney movie, that was drawn together. A short lived comedy central series, my bro likes to watch horrible tv when working.
|
|
|
|
Post by indkid87 on Dec 19, 2013 18:35:00 GMT -5
Ok, finally cleaned up my shifter and took some pics. Here's the clever bit, replaced the rubber doughnut with a rose joint. It's solid, and adjustable to make it easier to fit the short shifter. I had to use a half inch rose joint and then modify the end of the shift linkage to fit properly. You may be able to find on that fits better if you live in a country besides the US where you can get metric hardware easier. 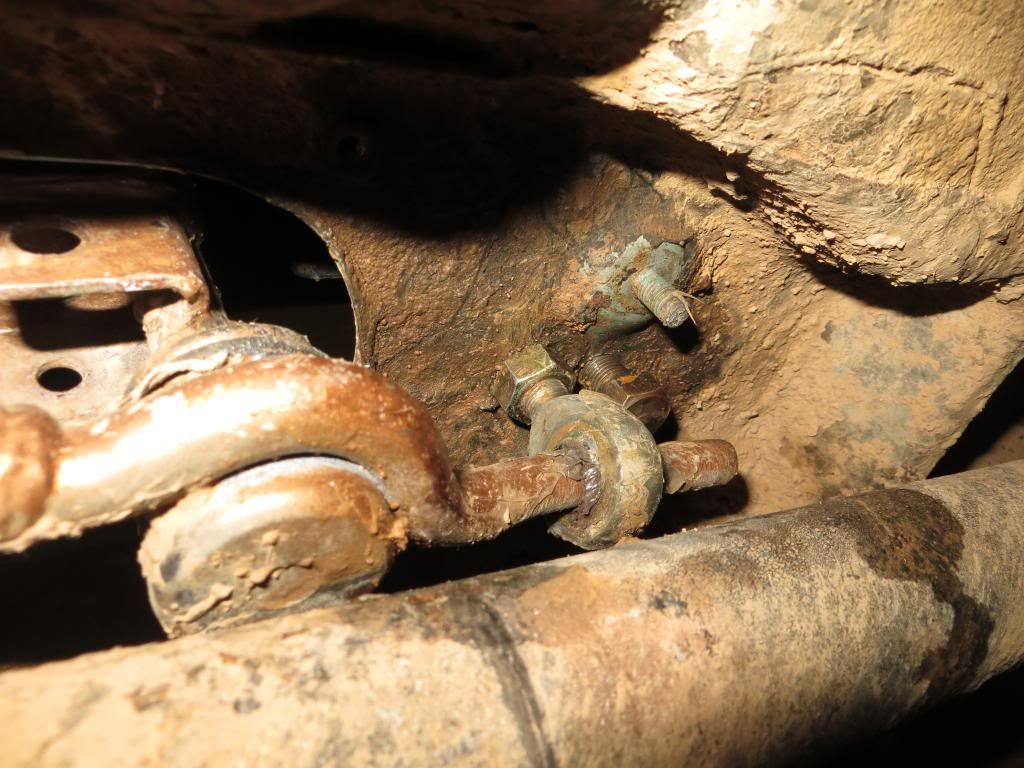 It is secured with a metal plate and a welded on nut, the back one is for more adjustment but I've never used it.  The front end is simply brass bushings. 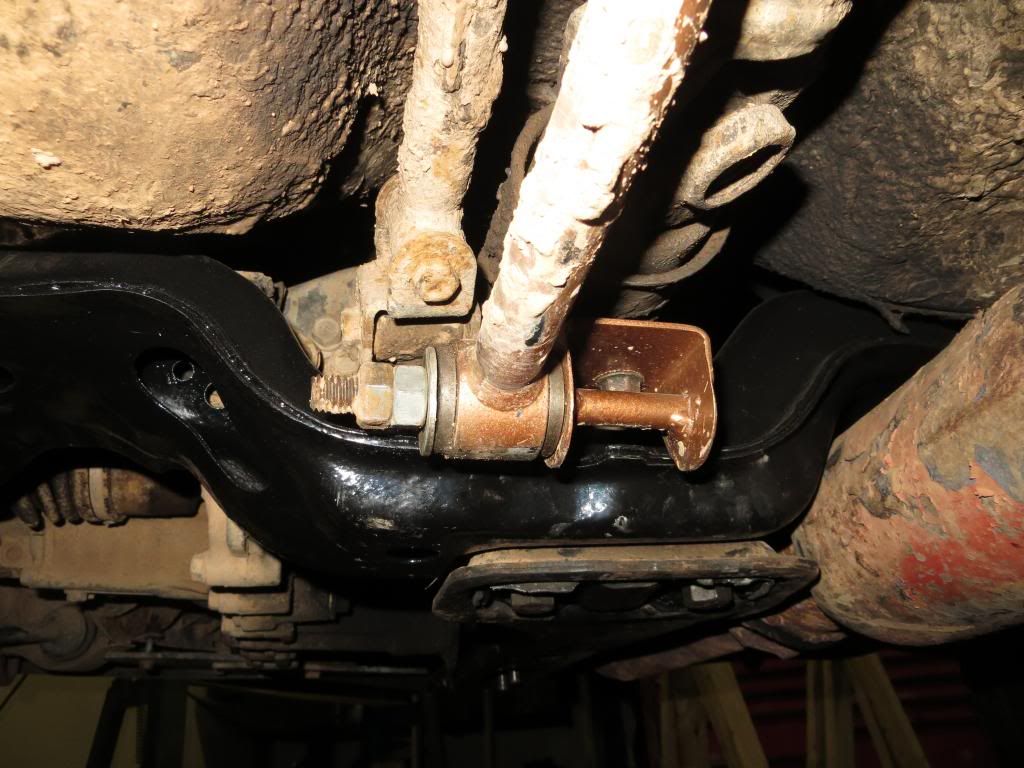 The rest of the assembly is just new stock stuff, it may get replaced later, but it's good for now. -Dave |
|
|
|
Post by indkid87 on Jan 12, 2014 16:42:43 GMT -5
So I hit a little road block. I was removing the tension rod brackets in the front to reinforce my skid plate mounts. I got to the last bolt and the captured nut inside the frame rail broke its welds.
Looks like I get to cut a hole in the frame rail. At least I had rust to fix there anyways
|
|
|
|
Post by madmatt on Jan 12, 2014 22:53:07 GMT -5
Same friggin thing happened to me... they came out, but putting them back in I got worried. Cut it out and welded in new plate with nuts. Same problem with rear subframe mounts.
|
|
|
|
Post by indkid87 on Jan 12, 2014 23:34:01 GMT -5
This is the first time it happened to me, I had a few bolts break off removing the subframe. That was an easy fix with some nuts and a welder. This time it's gonna take some more work.
I haven't had to touch anything in the rear yet. Maybe I'll pull it apart and rebuild it next winter. I've been kicking around ideas for adjustable suspension, I just need the time and funding.
|
|
|
|
Post by gearheadeh on Jan 25, 2014 12:21:02 GMT -5
As far as bolts breaking off, I have had lots of bad luck with the bolts that hold up the Gas tank breaking.  |
|
|
|
Post by indkid87 on Feb 1, 2014 0:58:33 GMT -5
That's a bummer, I never had any problems on the justy until I got to the subframe. I think I broke 4, but I got em out pretty easy by welding nuts on them.
Subaru seems to use really good hardware, on my infiniti you could break a bolt by looking at it wrong.
|
|


 Is your car an ecvt?