|
|
Post by blacklight on Dec 5, 2012 19:32:36 GMT -5
Hi all. Winter has come to Sweden, and with that the darkness... Therefor, I've brought a light-ramp and decided to install/integrate it into the grill of the car. The ramp is made out of 2(!)mm sheet steal, making it VERY sturdy, and heavy. The light sockets are made out of press-cast aluminium-alloy. The lights is 55x3w H11 clear, that followed the ramp. Consider this a type of guide for anyone that wants to do the same/similar mod.  Please note that I only have access to crude tools and no workshop, so it's very spartan made at some points.  I started off doing some measurements to place it, using a ruler and a marker.  Then I used a manual hacksaw (really recommend doing this in a easily-cleaned space and with an electric jigsaw. The grill is made out of hard ABS plastics, and it gives a lot of dust and a nice plastic-smell.) I cut through the xxxxxxx-shaped parts first, then the "collum" over the logo. I then the lower part of the grill and got the first piece out. Some trimming later and the hole was a fact.  I used a pre-existing hole from a stabilizer-rod to some lights a previous owner have had to position the middle hole correct. After that, it was pretty much a straitght-forward job in drilling the other ones. It tured out to be 5 holes/screws in the top, and 4 in the bottom.  After securing the ramp to the grill, I installed the light sockets. Not much to say here, some aiming will probably be reqired later (duh...)  Gonna install the ramp/grill tomorrow and make the electrical connections. Stay posted for mor pics.  //Magnus. |
|
|
|
Post by Cañon Carver on Dec 5, 2012 19:51:41 GMT -5
I love it, very very cool idea. I may have to copy this in some form later on, lol.
-Jamie
|
|
|
|
Post by Armageddous on Dec 5, 2012 22:50:17 GMT -5
Nice, clean install. I get tired of the near 10" lamps crudely mounted to the bumper skin or something similar.
I do have a plan to put some in mine, though I'm not going to cut the grill. (I couldn't do that to my 1st gen..)
Looks good though, looking forward to the finished product.
Terry
|
|
|
|
Post by Cañon Carver on Dec 6, 2012 1:19:47 GMT -5
I don't know if I have ever posted up my setup but..   |
|
|
|
Post by blacklight on Dec 6, 2012 16:30:06 GMT -5
Ok. Now it's installed and it works!... ...sort of. It responds to high/low beam states, but here's the tricky part: The relay controlling the lights seem to pull when the light switch is in either 0 (completely off) or parking light. This leads me to belive that there is a small current over the headlight enough to pull the relay, but not enough to lit up the light itself. Would a resistor on the relay control-coil (85 -> 86 on the relay) fix this? Sugguestions? Pics on the installed assembly will come. |
|
|
|
Post by islanderjusty on Dec 6, 2012 22:52:50 GMT -5
looks good way better then on the bumper skin
whereabouts did you wire your trigger wire for the new lights into
it sounds like you may be on the wrong pin on the relay or a poor ground happening on the coil side of the relay.
josh
|
|
|
|
Post by Armageddous on Dec 6, 2012 23:52:03 GMT -5
Are you trying to make them come on when the headlights are off? Why not just add a separate toggle switch that simply flips the relay? There should not be any residual current along the wire, unless you've managed to create a connection (maybe through the relay?)
Terry
|
|
|
|
Post by blacklight on Dec 7, 2012 6:51:42 GMT -5
islanderjusty and Armageddous: I trigger the relay from the passenger-side headlight high-beam wire. Think it was green (?).
Armageddous: Yes, I trigger 'em from the headlights respective state, because most other setups is kind of incinvinient (spelling) and there is a govermental agency here in sweden that might have something to complain about if it's not automaticly shut off when switching to low-beam.
All:
I take the feed-current directly from the battery, through a fuse, into the relay's switched terminals, to the extra-headlights, and it's ground through a dedicated ground cord I installed to the battery - pole.
I take the controlling-current from the high-beam cord on the right hand side (passenger side) main headlight high beam terminal, since this shouldn't be powerd in any other state than when in high beam mode.
I also have a dedicated ground cord from the control-terminal ground to the battery -, so I don't think it's bad feed or grund.
(Added later).
I just rememberd I installed some extra headlights on my E10 van (google it) and then I got the control-current from connecting a cord from respective side of the high-beam wires on the original harness.
This should work, right?
|
|
|
|
Post by hollandjusty on Dec 7, 2012 7:55:03 GMT -5
@ Terry, you'll need something like this ;D  |
|
|
|
Post by madmatt on Dec 7, 2012 11:09:49 GMT -5
Blacklight,
There is something weird about the light wiring... I use a relay to trigger my auxiliary lights just like you want to.
For some reason, I think it might be switched ground or something. But certainly not the standard set up I've used on other cars.
Matt
|
|
|
|
Post by blacklight on Dec 8, 2012 15:52:28 GMT -5
I fixed it!  My wiring diagram looks like this. Please say if there's errors, but this works and is safe.  I also made a video presentation and took some pictures of the working unit.  The car with low beam on.  The car with high beam and extra headlights on.  The car with low beam on, light result.  The car with high beam on, light result.  Also, here's a quick demonstration of the lighting. |
|
|
|
Post by madmatt on Dec 8, 2012 20:18:56 GMT -5
Ah yes, it is switched ground... and I'm sure you know this, but a switch in the feed to the relay allows you to switch the auxiliaries on and off without interrupting your stock highbeams
|
|
|
|
Post by Cañon Carver on Dec 8, 2012 20:42:12 GMT -5
Big difference with those 3 lights. I have some LED fogs on the way to mount behind the grill along side the oval fogs.
|
|
|
|
Post by blacklight on Dec 9, 2012 5:31:05 GMT -5
madmatt: Yes, I knew that all along, but I didn't think of it at the time. Cañon Carver: Indeed it is. Just to bad I only have a cellphone camera to film it with. May take my system camera and takes some shots today. |
|
|
|
Post by Armageddous on Dec 9, 2012 13:34:46 GMT -5
Cool, looks good.
That wiring should work without any issues, the only thing I would worry about is the current draw on the common wire as it probably has a fuse in it somewhere.
Terry
|
|
|
|
Post by blacklight on Dec 12, 2012 8:40:52 GMT -5
Armageddous: Thanks. A relay just draws an extra 1,6 watts, depenting on the realy, so I think it's allright. |
|
|
|
Post by Armageddous on Dec 12, 2012 21:57:35 GMT -5
Ah weird, I sort of read it wrong.
Terry
|
|
|
|
Post by blacklight on May 31, 2013 14:29:18 GMT -5
...and when you thought this was in the history books... Since I'm in the middle of fixing up my Justy, I thought, why not paint the ramp too? Pics: First off, some light sandpapering of the surface to make the paint stick.  I had 3 almost-empty cans of paint, so I used it to give it a first coat of paint. I'll probably sand it down later to make it flat, and then put on a second layer. I feel good about this.  //Magnus |
|
|
|
Post by failsatheals on Mar 2, 2014 16:47:28 GMT -5
Any finished daylight pictures of the justy with it??
|
|
|
|
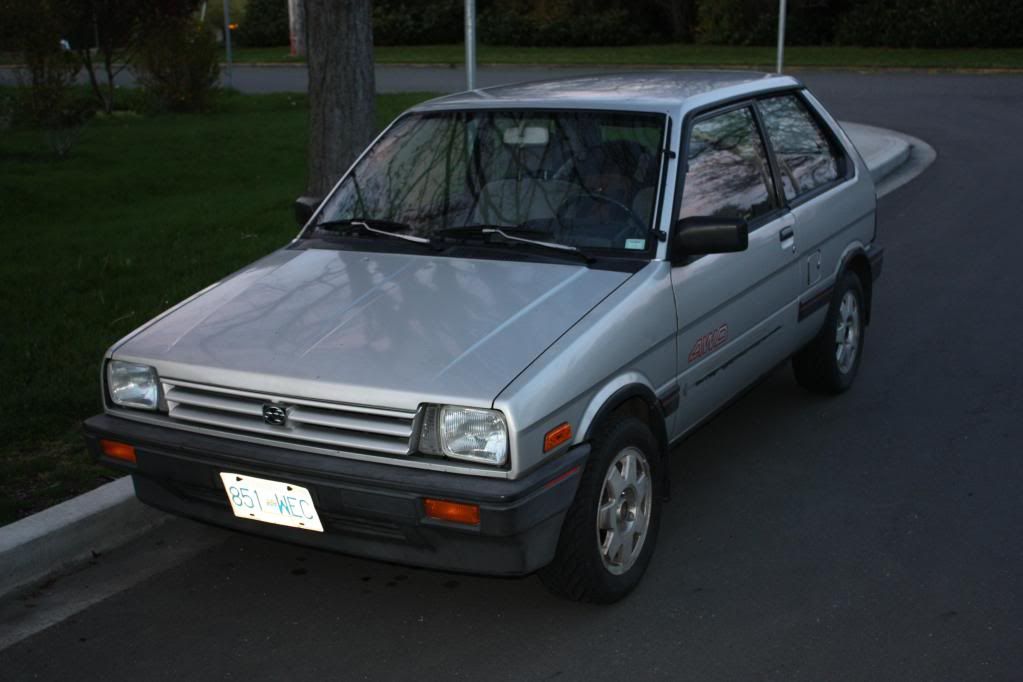
Post by blacklight on Mar 3, 2014 2:51:46 GMT -5
Any finished daylight pictures of the justy with it?? Ah! Sorry, here you go.  Note the flush-line with the grill shape.  |
|